1- How To Install Apache Django Postgresql on Ubuntu 22.04 Part1
In this post we are going to install Django 4.0.6 (current version), Apache 2 and Postgresql . Installing them was pretty easy on Windows OS but I had some difficulties on Ubuntu and I had to read various forum posts, articles and videos. So,I decided to share how we can configure Apache Django and Postgresql on Ubuntu 22.04.
In these Django article series, You will see that my Project is named as "PrjMovieApp", Application Name is named as "movieapp". I will create a movie site on which users can watch and comment movies.
Before we start I want to show the folder structure I am going to create.
-Movies(Root Folder)
	-v_envMovies(Virtual enviroment)
	-PrjMovies(Project folder)
	-static
	-media
Lets install pip, apache and mod-wsgi first.
sudo apt update
sudo apt install python3-pip apache2 libapache2-mod-wsgi-py3
Install Virtual Environment on Ubuntu System with this command (if you have not installed virtualenv before)
sudo pip3 install virtualenv
I will create a main Folder named CRM under /home/myusername. Set the permissions. Then I will create virtual environment for this project named v_envCRM in CRM folder and activate the virtual environment.
cd /home/youruserfolder
mkdir Movies
cd Movies
virtualenv v_envMovies -p python3
source ./v_envMovies/bin/activate
Now we can install Django
pip install django
Now I will create a project named PrjCrm. Note that there is space and dot after the project name. This command creates the django project folder and files in CRM folder.
django-admin startproject PrjMovies .
Open up project's settings.py file with a text editor like nano and specify static and media URL and ROOT.
Also import os at the top of the settings.py file.
nano /home/userfolder/Movies/PrjMovies/settings.py
STATIC_URL: URL where the user can access your static files from in the browser. The default is /static/, which means your files will be available at http://127.0.0.1:8000/static/
For example: http://127.0.0.1:8000/static/css/main.css
STATIC_ROOT: typically is the top folder of your Django Project. The absolute path to the directory where your Django application will serve your static files from. When you run the collectstatic management command, it will find all static files and copy them into this directory.
In my case, BASE_DIR is the Movies folder (top folder) and STATIC_ROOT is /home/userfolder/Movies/static/ folder.
MEDIA_ROOT: is the folder where files uploaded using FileField.
STATICFILES_DIRS: By default, static files are stored at the app-level at <APP_NAME>/static/. The collectstatic command will look for static files in those directories. You can also tell Django to look for static files in additional locations with STATICFILES_DIRS
Make sure you import os.
import os

STATIC_URL = '/static/'
STATIC_ROOT = os.path.join(BASE_DIR, "static/")
MEDIA_ROOT = os.path.join(BASE_DIR, "media/")
Create the static folder in /home/userfolder/Movies folder
cd /home/userfolder/Movies
mkdir static
mkdir media
Run the server with the following command to make sure everything is OK so far. Check on your browser if it works (127.0.0.1:8000)
cd /home/username/Movies
python3 manage.py runserver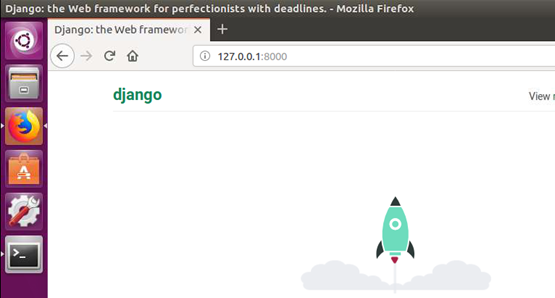
Use Ctrl + C to stop Django server. Then use deactivate command on Terminal to deactivate the virtual environment for now.
deactivate
Edit hosts file and add your server address
sudo nano /etc/hosts

#Add this entry
127.0.0.1 prjmovies.local
On your browser, type http://prjmovies.local and it should display default apache page

Now I am going to copy the existing apache default config file and edit it accordingly.
cd /etc/apache2/sites-available/
sudo cp 000-default.conf apache_movie.conf
sudo nano apache_movie.conf
Apache config should be similar to this. Modify this according to your folder structure and make sure these line are between the <VirtualHost> tags
<VirtualHost *:80>

ServerAdmin webmaster@localhost
ServerName prjmovies.local
ServerAlias www.prjmovies.local
#Document Root should be the folder where wsgi file is located
DocumentRoot /home/selim/Movies/PrjMovies

#Make sure you type static path ending with / like below
#Otherwise Django Admin Page will not load CSS, JS and other static files
Alias /static/ /home/youruserfolder/Movies/static/
<Directory /home/youruserfolder/Movies/static/>
    Require all granted
</Directory>


Alias /media/ /home/youruserfolder/Movies/media/
<Directory /home/youruserfolder/Movies/media/>
    Require all granted
</Directory>

<Directory /home/youruserfolder/Movies/PrjMovies>
                <Files wsgi.py>
    Require all granted
                </Files>
</Directory>

#python-path must be the folder where manage.py is located AND python-home must be your virtual enivronment
WSGIDaemonProcess PrjMovies python-path=/home/youruserfolder/Movies python-home=/home/youruserfolder/Movies/v_envMovies
WSGIProcessGroup PrjMovies
WSGIScriptAlias / /home/youruserfolder/Movies/PrjMovies/wsgi.py

	ErrorLog ${APACHE_LOG_DIR}/error.log
	CustomLog ${APACHE_LOG_DIR}/access.log combined

</VirtualHost>
Save and Exit.
Enable Apache Virtual Host
cd /etc/apache2/sites-available
sudo a2ensite apache_movie.conf
systemctl reload apache2
Set Permissions:
Allow access to Apache on both port 80 and 443 on Firewall
sudo ufw allow 'Apache Full'Set CRM folder's owner as Apache
sudo chown :www-data /home/youruserfolder/Movies
sudo chgrp -R www-data /home/youruserfolder/Movies
sudo chmod 755 /home/youruserfolder
We will test our Apache Config but before testing it we need to add ServerName to apache.conf file otherwise it will give warnings:
sudo nano /etc/apache2/apache2.confAdd ServerName (mine is Django) and save it.

Now we can run configtest. It should returm Syntax OK
sudo apache2ctl configtest
cd /home/youruserfolder/Movies

#Reactivate the virtual environment
source v_envMovie/bin/activate
Edit settings.py file for Allowed Hosts and save.
nano /home/userfolder/CRM/PrjCrm/settings.py
ALLOWED_HOSTS = ['prjmovies.local']
Now let's start django web server and see it works without problems. After we confirm that, we will stop django web server and test the Apache.
Change working directory to where your manage.py file resides
cd /home/userfolder/Movies
python3 manage.py runserver
Check if Django Web Server works by browsing 127.0.0.1:8000
Now stop the Server with (Ctrl +C)
deactivate the virtual environment with "deactivate" command
restart Apache
sudo service apache2 restart
Apache is working just fine.

You may wanna see Apache logs for issues, If so you can use the command below.
tail -f /var/log/apache2/error.log
Some Additional Notes:
Actually we have completed Apache configuration for Django. I just add some additional notes about Apache config that I might need to check in the future.
In this post we used /home/myuser/myDjangoProject as the location. You might want to use another location such as /opt, /var. Therefore I want to addsome additional info about file/folder permission in case we may need to use.
#sets the MovieApp folder's owner as user selim
sudo chown -R selim /opt/Movies

#Apache and NGINX use www-data as the user for web server.
#We will make it as group owner of our website’s files & folders.
sudo chgrp -R www-data /opt/Movies

#750 means owner can read, write & execute;
#group owner and read & execute and others has no permissions
sudo chmod -R 750 /opt/Movies

#if new files & folders are added to your website,
#they inherit the same group ownership from parent folder
sudo chmod g+s /opt/Movies

#if you need your web server to be able to write to files & folders,
#you can modify the above command as shown below.
sudo chmod g+w /opt/Movies
How to Host Multiple Django Projects on Apache:
You can host multiple django projects on the same Apache Server. I will not go into the details step by step. I will just explain the basic steps.
- Create another Project folder under /home/userfolder
- Create another virtual environment under /home/userfolder/yourSecondaryProjectFolder
- Activate the virtual environement, Install Django, Start a Django Project, Create static folder and define your static folder's path in settings.py
- Deactivate the venv, add your new address in /etc/hosts file
- copy the existing apache conf file under /etc/apache2/sites-available/ and create a new one
This is the newly created apache conf file,you can compare with the first apache conf file above
<VirtualHost *:80>

ServerAdmin webmaster@localhost
ServerName prjtask.local
ServerAlias www.prjtask.local
#Document Root should be the folder where wsgi file is located
DocumentRoot /home/youruserfolder/Task/PrjTask

#Make sure you type static path ending with / like below
#Otherwise Django Admin Page will not load CSS, JS and other static files
Alias /static/ /home/youruserfolder/Task/static/
<Directory /home/youruserfolder/Task/static/>
    Require all granted
</Directory>


<Directory /home/youruserfolder/Task/PrjTask>
                <Files wsgi.py>
    Require all granted
                </Files>
</Directory>

#python-path must be the folder where manage.py is located AND python-home must be your virtual enivronment
WSGIDaemonProcess PrjTask python-path=/home/youruserfolder/Task python-home=/home/youruserfolder/Task/v_envTask
WSGIProcessGroup PrjTask
WSGIScriptAlias / /home/youruserfolder/Task/PrjTask/wsgi.py

        ErrorLog ${APACHE_LOG_DIR}/error.log
        CustomLog ${APACHE_LOG_DIR}/access.log combined

</VirtualHost>
- Enable this virtual host by using the command "sudo a2ensite apacheConfigFile.conf"
- Set the folder permission as explained above
- Allow this new address (prjtask.local for example) in settings.pyfile (ALLOWED_HOSTS)
-Restart Apache service. That's it.
In Part2, We will install and configure Postgresql for our environment.How To Install Apache Django Postgresql on Ubuntu 22.04 Part2
- Hits: 1156