NextCloud on Ubuntu 18.04
Installation and Configuration of NextCloud on Ubuntu 18.04:
sudo su -
apt update
apt upgrade
apt autoremove
Install Apache and add apache service to startup:
apt install apache2
systemctl start apache2
systemctl enable apache2
Check if browsing the server ip address bring the apache welcome page correctly.

Install MariaDB Server
apt install mariadb-server
mysql_secure_installation

The root password here is for MariaDB root, So leave it empty and just hit Enter.
Then Set MariaDB root password and answer the rest of the questions with defaults by hitting just Enter key.
Install PHP
apt install php libapache2-mod-php php-mysql
Install PhpMyAdmin
apt install phpmyadmin

Click Yes

nano /etc/apache2/apache2.conf
Add this line to the apache conf file : Include /etc/phpmyadmin/apache.conf

Restart the Apache Service
service apache2 restart
Now we can use phpMyAdmin by browsing serverIPaddress/phpmyadmin (because we installed MariaDB witth defaults, root access is not available for security)
Create DB and DB Admin User on MariaDB
Type the following commands on terminal
mariadb
CREATE DATABASE myncdb;
CREATE USER myncadmin IDENTIFIED BY 'YourPassword';
GRANT USAGE ON *.* TO myncadmin@localhost IDENTIFIED BY 'YourPassword'; (This command tells MariaDB that this account can use this database)
GRANT ALL privileges ON myncdb.* TO myncadmin@localhost; (This command tells MariaDB that this account has all the privileges on this database)
FLUSH PRIVILEGES;
quit;
(Optional) Root-like User Creation
If you want to create a root like user
MariaDB [(none)]> CREATE USER Rootlikeusername IDENTIFIED BY 'YourPassword';
MariaDB [(none)]> GRANT ALL PRIVILEGES ON *.* TO 'Rootlikeusername'@'%' WITH GRANT OPTION;
FLUSH PRIVILEGES;
quit;
Install Required and recommended modules:
apt-get install php-gd php-json php-mysql php-curl php-mbstring
apt-get install php-intl php-imagick php-xml php-zip
Download and Install NextCloud
Go to https://nextcloud.com/install/#instructions-server and copy the download link for .tar.bz2 (https://download.nextcloud.com/server/releases/nextcloud-15.0.4.tar.bz2)
On Ubuntu terminal, type
wget https://download.nextcloud.com/server/releases/nextcloud-15.0.4.tar.bz2
tar -xvf nextcloud-15.0.4.tar.bz2
cd ~/nextcloud
ls -al
mv ./* /var/www/html (Move everything in nextcloud folder to html folder)
ls -al (.htaccess and .user.ini should be moved manually)
mv .htaccess /var/www/html
mv .user.ini /var/www/html
Set the Ownership for NextCloud Files
cd /var/www/html
chown -R www-data:www-data ./*
chown -R www-data:www-data .htaccess
chown -R www-data:www-data .user.ini
ls -al
mkdir /nextcloud-data
chown www-data:www-data /nextcloud-data
Restart Apache Service and browse IP address of the server
service apache2 restart
Browse IP address of the server and fill the required field to install NextCloud. NextCloud will be installed in a short time.

AD Integration:
To enable LDAP user and group backend Application, open Terminal and type
apt install php-ldap
service apache2 restart
Apps > Go to the bottom of the Apps list and enable LDAP user and group backend Application.
We enabled the App, Now we can configure it for the AD integration.
First create a domain account for nextcloud, it is enough for that account to be only in Domain Users group.
On Terminal,
apt install ldap-utils
Run the following command to see if we can query the AD database
ldapsearch -b DC=yourdomain,DC=edu,DC=local -H ldap://yourdomain.edu.local -D
Click the top right menu and click Settings
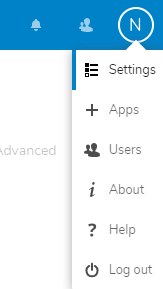
On the left menu, select LDAP / AD integration


Then click continue and select Login Attributes and Group and complete the wizard.
Click the top right menu and click Users. AD users will be listed.
Adding External Storages:
Click the top right menu and click Apps > Enable External Storage Support
Click the top right menu and click Settings > Click Administration on the left menu > select External Storages
You will see the message
"smbclient" is not installed. Mounting of "SMB / CIFS", "SMB / CIFS using OC login" is not possible. Please ask your system administrator to install it.
On Terminal, type the commands below.
Sudo apt-get install libsmbclient
Sudo apt-get install smbclient
Sudo apt install smbclient php-smbclient
nano /etc/samba/smb.conf
#add the lines below in [global]
client min protocol = SMB2
client max protocol = SMB3
reboot
You can now add smb shares, local disks or ftp storage like below
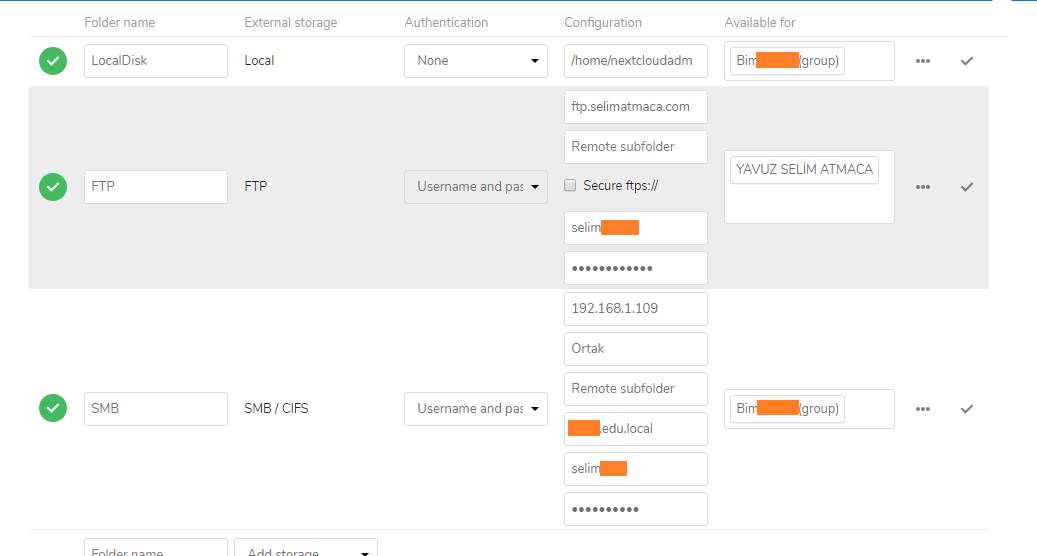
Note: SMB external storage was not letting me to choose Log-in credentials,saved in session. I created an Active Directory user named with the same name as my nextcloud web admin. Then I gave localadmin right to that AD user on the Windows file server. Now I can select "Log-in credentials,saved in session" when creating SMB external storage but every user who connects SMB has to be local admin on the file server for this to work and this is not applicable. I mean "Log-in credentials,saved in session" is not something I can use in my environment.
Therefore I connect SMB external storage with nextcloud admin's username and password. Every file I copy on the fileserver is getting NTFS permission of the folder in which they are being copied.
Enabling HTTPS on Apache:
You can read my post about Enabling SSL on Apache.
After you enable https, you also need to edit nextcloud's config.php
nano /var/www/html/config/config.php
'trusted_domains' =>
array (
0 => '192.168.0.29',
1 => 'cloud.example.com',
),
save config.php and restart apache service. Now you can reach https://cloud.example.com
If you navigate Settings>Administration>Overview, You will see some warnings about security.
nano /etc/apache2/sites-enabled/default-ssl.conf
Add the lines below right after the ServerName
  ServerName cloud.nextcloud.com
    <IfModule mod_headers.c>
      Header always set Strict-Transport-Security "max-age=15552000; includeSubDomains; preload"
    </IfModule>

<Directory /var/www/html/>
Options +FollowSymlinks
AllowOverride All
</Directory>

Run the command below and  restart apache
a2enmod headers
service apache2 restart


apt install php-apcu
service apache2 restart


nano /var/www/html/config/config.php
Add this line
'memcache.local' => '\OC\Memcache\APCu',
nano /etc/php/7.2/apache2/php.ini
Search for opcache and comment out the lines below:
opcache.enable=1
opcache.enable_cli=1
opcache.memory_consumption=128
opcache.interned_strings_buffer=8
opcache.max_accelerated_files=10000
opcache.revalidate_freq=1
opcache.save_comments=1
service apache2 restart


Finally run this as www-data user (not as root)
sudo -u www-data php ./occ db:convert-filecache-bigint


All warnnings must be green and passed now
- Hits: 6223