Part9 - Creating Multiple Resolutions and Resolution Switcher
This articles describes how to create multiple video outputs with different resolutions and how to add a resolution switcher on our videos. First I want to share my running nginx config (/usr/local/nginx/conf/nginx.conf) file. I am sending my stream to live application from the OBS encoder and create multiple resolutions and publish those outputs under the Mezuniyethls application. From my web player I am going to call mezuniyethls stream. Here is my nginx.conf.
#user nobody;
user  your_nginx_admin_user;
worker_processes  1;

#error_log  logs/error.log;
#error_log  logs/error.log  notice;
#error_log  logs/error.log  info;

#pid        logs/nginx.pid;


events {
    worker_connections  1024;
}


http {
    include       mime.types;
    default_type  application/octet-stream;

    #log_format  main  '$remote_addr - $remote_user [$time_local] "$request" '
    #                  '$status $body_bytes_sent "$http_referer" '
    #                  '"$http_user_agent" "$http_x_forwarded_for"';

    #access_log  logs/access.log  main;

    sendfile        on;
    #tcp_nopush     on;

    #keepalive_timeout  0;
    keepalive_timeout  65;

    #gzip  on;

    server {
        listen       80; #I use  http  for my tests
        server_name  192.168.1.100;

        #charset koi8-r;

        #access_log  logs/host.access.log  main;


        location /hls {
        # Serve HLS fragments
        types {
            application/vnd.apple.mpegurl m3u8;
            video/mp2t ts;
        }
        root /tmp/;
        add_header Cache-Control no-cache;
        add_header 'Access-Control-Allow-Origin' '*';
          }

        location /mezuniyethls {
        # Serve HLS fragments
        types {
            application/vnd.apple.mpegurl m3u8;
            video/mp2t ts;
        }
        root /tmp/;
        add_header Cache-Control no-cache;
        add_header 'Access-Control-Allow-Origin' '*';
          }


        location / {
            root   html;
            index  index.html index.htm;
        }


        #error_page  404              /404.html;

        # redirect server error pages to the static page /50x.html
        #
        error_page   500 502 503 504  /50x.html;
        location = /50x.html {
            root   html;
        }

        # proxy the PHP scripts to Apache listening on 127.0.0.1:80
        #
        #location ~ \.php$ {
        #    proxy_pass   http://127.0.0.1;
        #}

        # pass the PHP scripts to FastCGI server listening on 127.0.0.1:9000
        #
        #location ~ \.php$ {
        #    root           html;
        #    fastcgi_pass   127.0.0.1:9000;
        #    fastcgi_index  index.php;
        #    fastcgi_param  SCRIPT_FILENAME  /scripts$fastcgi_script_name;
        #    include        fastcgi_params;
        #}

        # deny access to .htaccess files, if Apache's document root
        # concurs with nginx's one
        #
        #location ~ /\.ht {
        #    deny  all;
        #}
    }


    # HTTPS server
    #
    server {

        listen       443 ssl;
        server_name  stream.mydomain.com.tr;
	ssl		on;
       ssl_certificate      /etc/ssl/certs/streambundle.pem;
        ssl_certificate_key  /etc/ssl/private/stream.mydomain.com.tr.key;

        ssl_session_cache    shared:SSL:1m;
        ssl_session_timeout  5m;

        ssl_ciphers  HIGH:!aNULL:!MD5;
        ssl_prefer_server_ciphers  on;

        location /hls {
        # Serve HLS fragments
        types {
            application/vnd.apple.mpegurl m3u8;
            video/mp2t ts;
        }
        root /tmp/;
        add_header Cache-Control no-cache;
        add_header 'Access-Control-Allow-Origin' '*';
          }


       location /mezuniyethls {
        # Serve HLS fragments
        types {
            application/vnd.apple.mpegurl m3u8;
            video/mp2t ts;
        }
        root /tmp/;
        add_header Cache-Control no-cache;
        add_header 'Access-Control-Allow-Origin' '*';
          }


        location / {
            root   html;
            index  index.html index.htm;
        }
    }

}


rtmp {
 server {
    listen 1935;
#The ip addresses  below are made up for security
    application live {
	allow play all;
        allow publish 127.0.0.1;
        allow publish 192.168.1.100;
        #allow publish 10.30.5.101;
        allow publish 192.168.1.200;
	allow publish 10.30.95.43;
       allow publish 10.30.76.52;
        deny publish all;
        live on;
####I am sending my stream to live application from the OBS encoder and create multiple
####resolutions and publish those outputs under the Mezuniyethls application.
####From my web player I am going to call mezuniyethls stream
exec ffmpeg -i rtmp://192.168.1.100/live/$name -threads 1
-c:v libx264 -profile:v baseline -b:v 768K -s 480x360
-f flv -c:a aac -ac 1 -strict -2 -b:a 96k rtmp://192.168.1.100/mezuniyethls/$name_360
-c:v libx264 -profile:v baseline -b:v 1024K -s 858x480
-f flv -c:a aac -ac 1 -strict -2 -b:a 128k rtmp://192.168.1.100/mezuniyethls/$name_480
-c:v libx264 -profile:v baseline -b:v 1920K -s 1280x720
-f flv -c:a aac -ac 1 -strict -2 -b:a 128k rtmp://192.168.1.100/mezuniyethls/$name_720
-c:v libx264 -profile:v baseline -b:v 2048K -s 1920x1080
-f flv -c:a aac -ac 1 -strict -2 -b:a 128k rtmp://192.168.1.100/mezuniyethls/$name_1080;

					}


    application mezuniyethls {
	#The ip addresses  below are made up for security
        live on;
        hls on;
        hls_path /tmp/mezuniyethls/;
        hls_fragment 6s;
        hls_playlist_length 60s;
        allow play all;
       allow publish 10.30.76.52;
        allow publish 127.0.0.1;
        allow publish 192.168.1.100;
#        allow publish 10.30.5.239;
        allow publish 192.168.1.1200;
	allow publish 10.30.95.43;

        deny publish all;

             hls_variant _360 BANDWIDTH=448000;
             hls_variant _480 BANDWIDTH=1152000;
             hls_variant _720  BANDWIDTH=2048000;
             hls_variant _1080  BANDWIDTH=4096000;
   }
 }
}
OBS Encoder Settings:
Stream Tab:
Stream Type: Custom Streaming Server
URL: rtmp://stream.mydomain.com.tr/live
Stream Key: WhateverYouEnterHere
Output Tab:
Encoder: x264
Rate Control: CBR
BitRate:2500
Keyframe Interval: 2 seconds
CPU Usage: very fast
Audio Tab:
Sample Rate: 48khz
Channels: Stereo
Video Tab:
Base Resolution: 1280x720
Output Resolution: 1280x720
Downscale Filter: Bicubic
Common FPS Values: 10
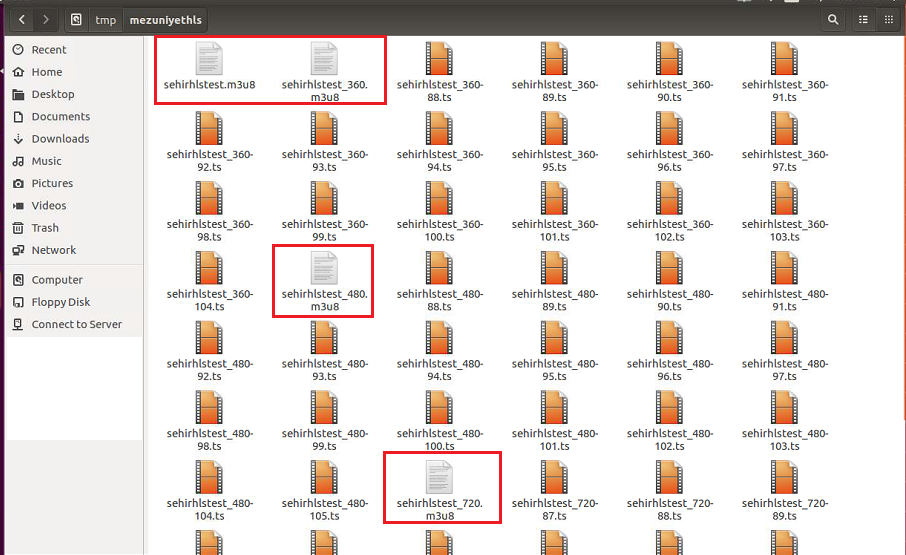
After you start streaming, you will see different resolution files and their indexes will be created. We will call these indexes from the web player.
Web Player and Resolution Switcher:
First we need to download the resolution switcher onto our web server on which VideosJS already installed. Here is the link:
https://github.com/kmoskwiak/videojs-resolution-switcher
I will be using the marked 2 files for resolution switcher. Copy them to /usr/local/nginx/html

and call them in your html page.
<!DOCTYPE html>

<html>

<head>

<meta charset=utf-8 />

<title>Test Resolution Switcher</title>

<link href="/video-js.min.css" rel="stylesheet">

<link href="/videojs-resolution-switcher.css" rel="stylesheet">

<script src="/video.min.js"></script>

<script src="/videojs-contrib-hls.js"></script>

<script src="/videojs-resolution-switcher.js"></script>

<script>

var player = videojs('video');

 player.play();

</script>

</head>


<body style="width:890px;height:400px;">

<center style="margin-top:170px;">

<video poster="/" id="video" class="video-js vjs-default-skin" controls autoplay preload="auto" width="640" height="360" data-setup='{}'/>

<source src="http://192.168.1.100/mezuniyethls/MyStreamKey_360.m3u8?360" type="application/x-mpegURL" label="360" res="360" />

<source src="http://192.168.1.100/mezuniyethls/MyStreamKey_480.m3u8?480" type="application/x-mpegURL" label="480" res="480" />

<source src="http://192.168.1.100/mezuniyethls/MyStreamKey_720.m3u8?720" type="application/x-mpegURL" label="720" res="720"/ >

<source src="http://192.168.1.100/mezuniyethls/MyStreamKey_1080.m3u8?1080" type="application/x-mpegURL" label="1080" res="1080"/ >


<p class="vjs-no-js">To view this video please enable JavaScript, and consider upgrading to a web browser that

<a href="http://videojs.com/html5-video-support/" target="_blank">supports HTML5 video</a>

</p>

</video>

<script>

  videojs('video').videoJsResolutionSwitcher()

</script>

</center>

</body>

</html>
And resolution switcher works as below. It is good idea toset your player to start video automatically, so if the viewer change resolution video will load automatically and he does not have to start the video if resolution changes.

It works just fine.
- Hits: 5227