Part10 - Adaptive Bitrate Streaming with Nginx and VideoJS
In my previous articles, I've already shared my running Nginx config. Instead of sharing the whole config file, it is enough to present only nginx application part and html page that calls VideoJS.
To be able to use Adaptive Bitrate Streaming on VideoJS, you need to use VideoJS-contrib-hls plugin and in the source tag, you need to call only the master hls playlist.
<!DOCTYPE html>
<html>
<head>
<meta charset=utf-8 />
<title>Welcome to ABR Streaming</title>
<link href="/video-js.min.css" rel="stylesheet">
<link rel="stylesheet" type="text/css" href="/mycustomization.css">
<script src="/video.min.js"></script>
<script src="/videojs-contrib-hls.js"></script>
<script>
var player = videojs('video');

player.play();
</script>
</head>

<body style="width:890px;height:400px;">
<center style="margin-top:170px;">
<video poster="/logo.jpg" id="video" class="video-js vjs-default-skin" controls autoplay preload="auto" width="640" height="360" data-setup='{}'/>
<source src="https://mydomain.com.tr/liveoutput/livehls.m3u8" type="application/x-mpegURL" />


<p class="vjs-no-js">To view this video please enable JavaScript, and consider upgrading to a web browser that
			<a href="http://videojs.com/html5-video-support/" target="_blank">supports HTML5 video</a>
			</p>
</video>

</center>
</body>
</html>
When you start the stream from encoder, master hls playlist will be created. You can see the content of the playlist below. You can see FFMpeg creates 3 video outputs with different resolutions.
#EXTM3U
#EXT-X-VERSION:3
#EXT-X-STREAM-INF:PROGRAM-ID=1,BANDWIDTH=448000
livehls_360.m3u8
#EXT-X-STREAM-INF:PROGRAM-ID=1,BANDWIDTH=1152000
livehls_480.m3u8
#EXT-X-STREAM-INF:PROGRAM-ID=1,BANDWIDTH=2048000
livehls_720.m3u8
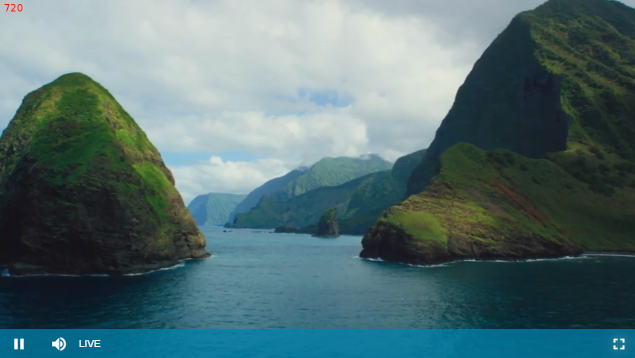
And here is the FFMpeg commands from Nginx.conf file. It receives the video from encoder and generates 360, 480 and 720p versions of the stream and outputs into "liveout" application . In liveoutput application, I define the available video based on the bandwith. By using -vf drawtext command, I add a text with red color that indicates the current resolution of the stream on my video player. So, I can make sure adaptive bit rate mechanism works correctly.
   application live {
        allow play all;
        allow publish 127.0.0.1;
        allow publish 192.100.1.100; #nginx
        allow publish 192.100.1.101; #encoder
        deny publish all;
        live on;
                exec ffmpeg -i rtmp://192.100.1.100/live/$name -threads 1
                        -c:v libx264 -profile:v baseline -b:v 768K -s 640x360
-vf "drawtext= fontcolor=red: fontsize=20: fontfile=/usr/share/fonts/truetype/dejavu/DejaVuSans.ttf: text='360': x=10: y=10:"
                        -f flv -c:a aac -ac 1 -strict -2 -b:a 96k rtmp://192.100.1.100/liveout/$name_360
                        -c:v libx264 -profile:v baseline -b:v 1024K -s 960x540
-vf "drawtext= fontcolor=red: fontsize=20: fontfile=/usr/share/fonts/truetype/dejavu/DejaVuSans.ttf: text='480': x=10: y=10:"
                        -f flv -c:a aac -ac 1 -strict -2 -b:a 128k rtmp://192.100.1.100/liveout/$name_480
                        -c:v libx264 -profile:v baseline -b:v 1920K -s 1280x720
-vf "drawtext= fontcolor=red: fontsize=20: fontfile=/usr/share/fonts/truetype/dejavu/DejaVuSans.ttf: text='720': x=10: y=10:"
                        -f flv -c:a aac -ac 1 -strict -2 -b:a 128k rtmp://192.100.1.100/liveout/$name_720
                        ;
}

    application liveout {
        live on;
        hls on;
        hls_path /tmp/liveout/;
        hls_fragment 6s;
        hls_playlist_length 60s;
        allow play all;
        allow publish 127.0.0.1;
        allow publish 192.100.1.100;
        allow publish 192.100.1.101;
        deny publish all;

      #hls_variant _240 BANDWIDTH=288000;
hls_variant _360 BANDWIDTH=448000;
hls_variant _480 BANDWIDTH=1152000;
hls_variant _720  BANDWIDTH=2048000;
      #hls_variant _1080 BANDWIDTH=4096000;

}
And here is the final result on VideoJS
And here is a reference bit rate - resolution table that you might need. It shows simply what bandwith is required for which resolutions.

UPDATE:
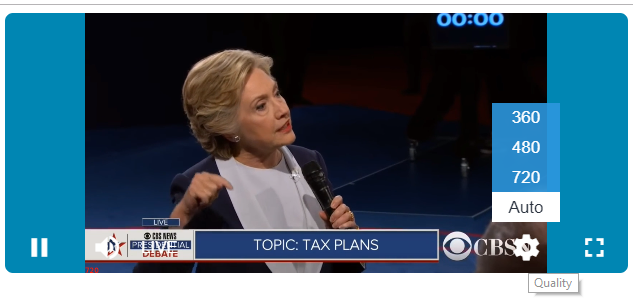
If you want to have resolution switcher and adaptive bit rate functionality on your player, you can do so. Here is my html page that you can take as an example.
In source tag, you see res as 1, 2 and 3. res is used for sorting and choosing the default video quality. In my example, I choose the adaptive bit rate stream as the default and users can switch whatever quality the want.
<!DOCTYPE html>
<html>
<head>
<meta charset=utf-8 />
<title>Live</title>
<link href="/video-js.min.css" rel="stylesheet">
<link href="/videojs-resolution-switcher.css" rel="stylesheet">
<script src="/video.min.js"></script>
<script src="/videojs-contrib-hls.js"></script>
<script src="/videojs-resolution-switcher.js"></script>
<script>
var player = videojs('video');
player.play();
</script>
</head>
<body>
<video poster="/logo.jpg" id="video" width="640px" height="267px" class="vjs-default-skin video-js vjs-big-play-centered" controls autoplay preload="none"  data-setup='{ "aspectRatio":"640:267"}'>

<source src="https://mydomain/exhls/livehls.m3u8?!Auto" type="application/x-mpegURL" label="Auto" res="1"/ >
<source src="https://mydomain/exhls/livehls_360.m3u8?360" type="application/x-mpegURL" label="360" res="2" />
<source src="https://mydomain/exhls/livehls_480.m3u8?480" type="application/x-mpegURL" label="480" res="3" />
<source src="https://mydomain/exhls/livehls_720.m3u8?720" type="application/x-mpegURL" label="720" res="4"/ >


<p class="vjs-no-js">To view this video please enable JavaScript, and consider upgrading to a web browser that
			<a href="http://videojs.com/html5-video-support/" target="_blank">supports HTML5 video</a>
			</p>
</video>
<script>
  videojs('video').videoJsResolutionSwitcher()
</script>
</body>
</html>
Here is the result
- Hits: 7058