10- Client Installation
To manage our computers via SCCM, we need to install client software on computers. There are many different methods to install client software. Selecting the installation method might differ according to your organization and environment. Sometimes you might need to use a few different methods.
A. Client-Push Installation: This is an installation method that we manually select the computer and send client software to it. Network connection between SCCM and Client computers should be working. The computer should be discovered by SCCM and firewall should also be configured.

B. Automatic Sitewide Client Push Installation:
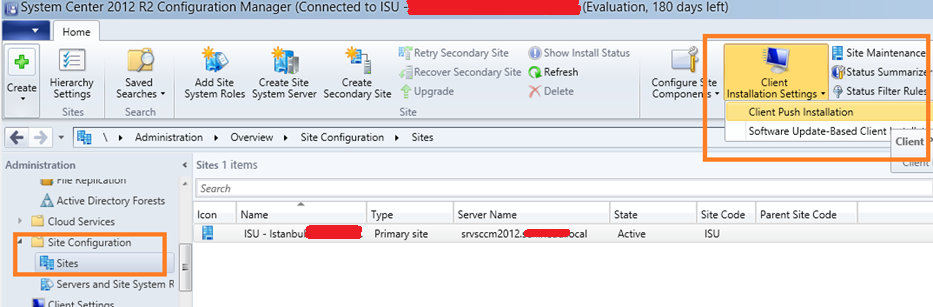
This method installs the client software to every computer in our boundary. To enable this method, navigate to Administration / Site Configuration / Sites / Client Installation Settings / Client Push Installation
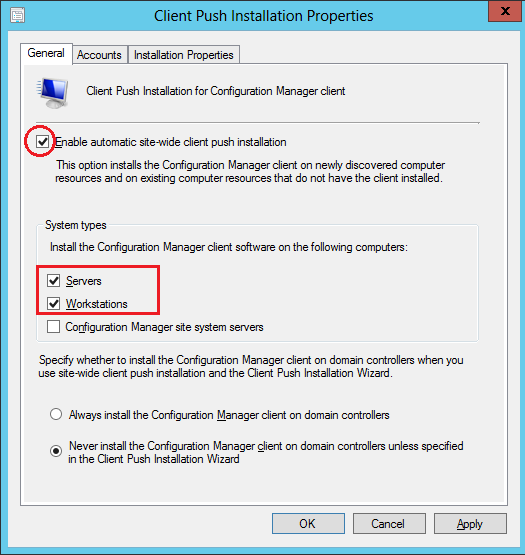
This is how you can enable it.
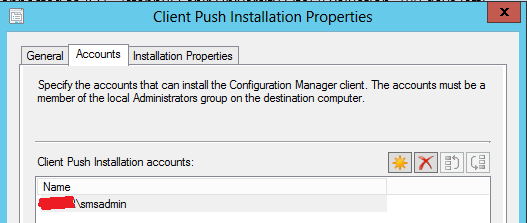
Under the accounts tab, we can specify which user account will be used to install the client software to computers. This user must have local admin privileges on the target computer. SCCM will install the client software on computers that it discovered. If installation fails, SCCM will create a CCR (Client Configuration Request) ticket and holds it under C:\Program Files\Microsoft Configuration Manager\inboxes\ccrretry.box folder and retries to install.
ccm.log under C:\Program Files\Microsoft Configuration Manager\Logs shows you the installation process. I highly recommend you to install CM Trace Tool to read or monitor the log files. Here is the download link for CM Trace Log Tool.
Also you can check Ccmsetup.log and Client.msi.log files on the client computers when troubleshooting installation problems. They are located under %Windir%\ccmsetup
To Cancel Automatic Sitewide Client Push : Navigate Administration-Site Configuration - Sites - Client Installation Settings - Client Push Installation and Disable the checkbox. Delete all CCR tickets in the inproc ve ccrretry folders. They are located as follows;
C:\Program Files\Microsoft Configuration Manager\inboxes\ccr.box\inproc
C:\Program Files\Microsoft Configuration Manager\inboxes\ccrretry.box


C. Software update point installation: If you decide to use this method, client computer dont have to be discovered by SCCM. We have to create a Group Policy Object and specify Software Update Point in that policy. So, client software is installed like a update. For Details see the link below.
http://technet.microsoft.com/en-us/library/bb633194.aspx
D. Manual Installation: CCMSetup.exe and required installation files are shared under the UNC path \\<Site Server Name>\SMS_SiteCode\Client. You can download these files and run setup file by using command prompt.
CCMSetup.exe /mp:srvsccm2012 /logon SMSSITECODE=AUTO FSP=srvsccm2012
The command above specifies the Management Point, if client already installed it cancels the installation, Installation will get SiteCode from Active Directory Domain Services and Fall Back Status point.
If you are using https communication for SCCM and if it servers on internet you can use command below:
CCMSetup.exe /usepkicert smsmp=srvsccm2012.yourdomain.local ccmhostname=sccm.yourinternetdomain.com smssitecode=AUTO
E. Client Installation Using Group Policy:
We can aslo use GPO to install client software. If you use this method Configuration Manager will be visible under Add/Remove Programs. You have to use the msi file under \bin\i386\CCMSetup.msi
If you extend the AD Schema and if you select "Publish this site in Active Directory Domain Services" from Administration/Site Configuration/Sites/ Site Properties, installation properties will be taken from Active Directory Domain Services.

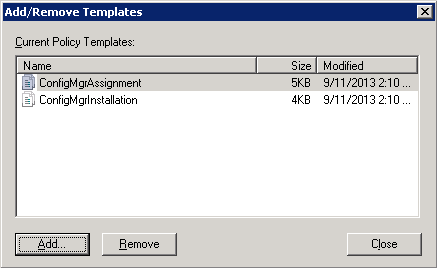
Copy ConfigMgrAssignment.adm and ConfigMgrInstallation.adm files under SMSSETUP\TOOLS\ConfigMgrADMTemplates from SCCMSetupFolder to Active Directory windir%\inf folder. Create a new GPO, Edit the GPO and navigate ComputerConfiguration/Policies/Administrative Templates and select Add/Remove Templates.

Click Add, import ConfigMgrAssignment.adm and ConfigMgrInstallation.adm files from windir%\inf folder.
Enable Configuration Manager Site Assignment


If you haven't expand the AD Schema or haven't published the Site over Active Directory, then you also have to enable "Configure CM 2012 Client Deployment Setting". CCMSetup textbox is for installation parameters for example CCMSetup.exe /mp:srvsccm2012 /logon SMSSITECODE=AUTO FSP=srvsccm2012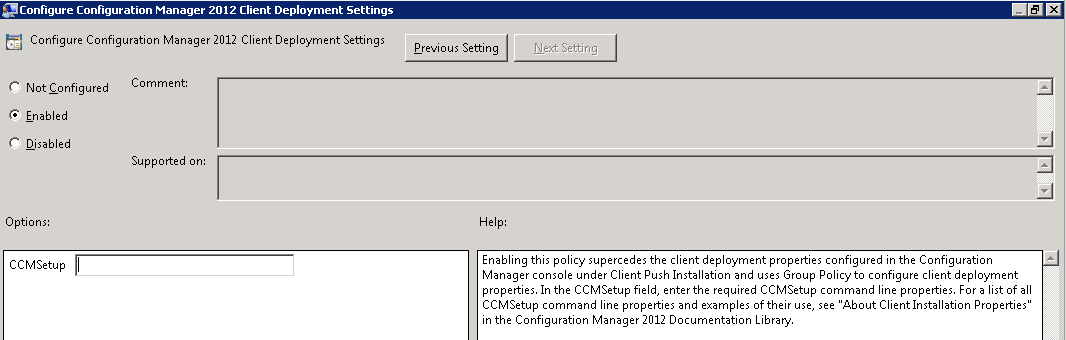
After we defined these policies, we need to show the UNC path for Software Installation Package (CCMSetup.msi). On Deploy Software Screen, Mark it as Assigned. \\serveraddress\ccmsetupfolder\ccmsetup.msi

Link the GPO to a OU and that's it.
F. Client Installation via Image:
It is also possible to include client software in our image. SiteCode to client computers have to be assigned by System Center 2012 Configuration Manager site, otherwise that computers can not work as SCCM clients. So, SMSSITECODE have to be AUTO in the command.
There are 4 steps that we need to implement.
1. Install client software to the reference computer. Make sure that installation perimeter for SMSSITECODE is AUTO.
CCMSetup.exe /mp:srvsccm2012 /logon SMSSITECODE=AUTO FSP=srvsccm2012
CCMSetup.exe /usepkicert smsmp=srvsccm2012.yourdomain.local ccmhostname=sccm.yourinternetdomain.com smssitecode=AUTO
2. After the client software is installed, run net stop ccmexec command to stop SMS Agent Host service.
3. Delete SMS and Personal certificates:
Start-run-mmc.exe
File-Add/Remove Snap-In
select Certificates and click Add
select Computer account and click Next
select Local computer and Finish and OK
navigate Certificates/Personal/Certificates and delete the certificate
navigate Certificates/SMS/Certificates and delete all the certificates here
Close MMC.
4. There must be a file named SmsCfg.ini under %SystemRoot%, delete this file.
5. Run enableAutoAssignment.vbs script to make sitecode as AUTO
EnableAutoAssignment.vbs
-----------------------------------------------
set oSMSClient = CreateObject("Microsoft.SMS.Client")
oSMSClient.EnableAutoAssignment 1
-----------------------------------------------------------
Start command prompt with admin privileges then run the code below
Cscript enableAutoAssignment.vbs
Now you can use Sysprep and start the computer in Audit Mode and finish preparing the reference computer.
For other client installation methods, see the link below.
http://technet.microsoft.com/en-us/library/gg712298.aspx
- Hits: 7449