22- Configuration Manager HTTPS Communication and PKI Certificate Part 4
Now we need to change the roles from HTTP to HTTPS. Log on to SCCM Server, open Console/Administration/Site Configuration/Servers and Site System Roles and select the server(s) that has following roles.
Management Point
Distribution Point
Application Catalog Web Service Point
Application Catalog Website Point
Software Update Point
Open Management Point Properties and set Client Connection as HTTPS. Because I have only 1 site server for internet and intranet clients, I will also select "Allow Intranet and Internet Connections"

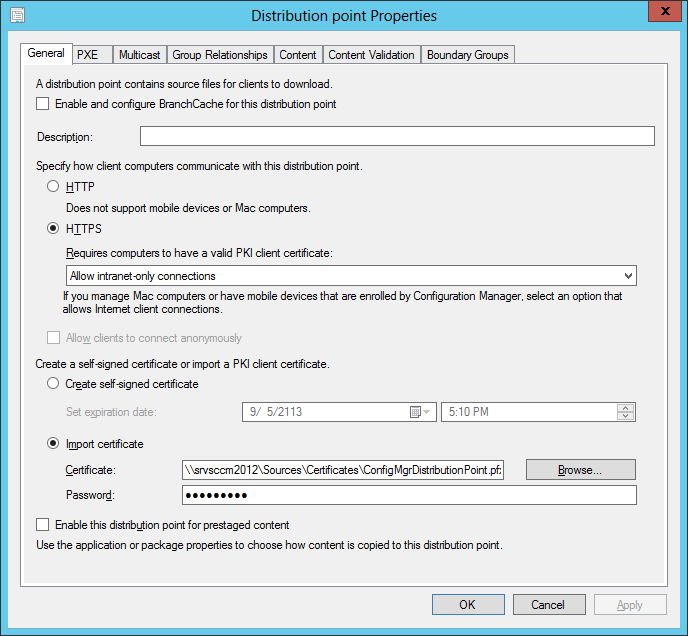
Open Distribution Point properties, select HTTPS. Because I am not going to install software packages to internet client at any times, I select on this page "Allow Intranet only connections". On Part 3 of this article series, we exported distribution point certficate. Choose Import Certificate, and show the path to exported certificate and type the password that you entered earlier for this certificate.
Open Application Catalog Web Service Point Properties, make sure HTTPS is selected.

Open Application Catalog Website Point Properties and make sure HTTPS is selected.

Open Software Update Point Properties. I am not going to update my internet clients via SCCM. So, I choose "Allow Intranet only Clients"

Open Site Properties.

Make sure HTTPS is selected. Client Certification selection is optional. Select Clients check the CRL for site systems.
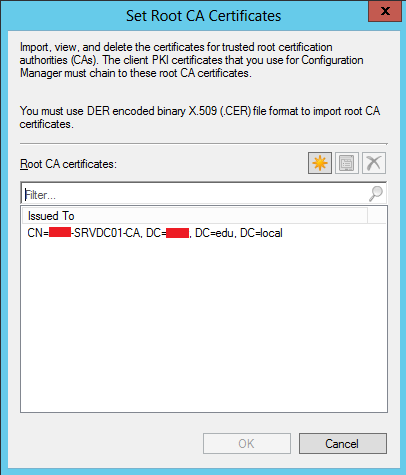
You also need to specify the trusted Root CA. Click on Set.

Click the star icon and import the root CA certification that has .cer extension. If you dont know where this file is, most probably you haven't exported the DER encoded binary X509(.CER)RootCA file yet. If so, please do the procudere below titled "HOW TO EXPORT ROOT CA CERTIFICATE:"
After you make sure that you have exported root ca file, you can hit the Set button above and import the ROOT CA certificate into SCCM.
HOW TO EXPORT ROOT CA CERTIFICATE:
This process should be done on the Certificate Authority server.
Click Start, click Run, type MMC in the Run dialog box, and then click OK.
In the empty console, click File and then click Add/Remove Snap-in. In the Add/Remove Snap-in dialog box, click Add. In the Add Standalone Snap-in dialog box, select Certificates and then click Next.
In the Select Computer dialog box, ensure the option Local computer: (the computer this console is running on) is selected and then click Finish.
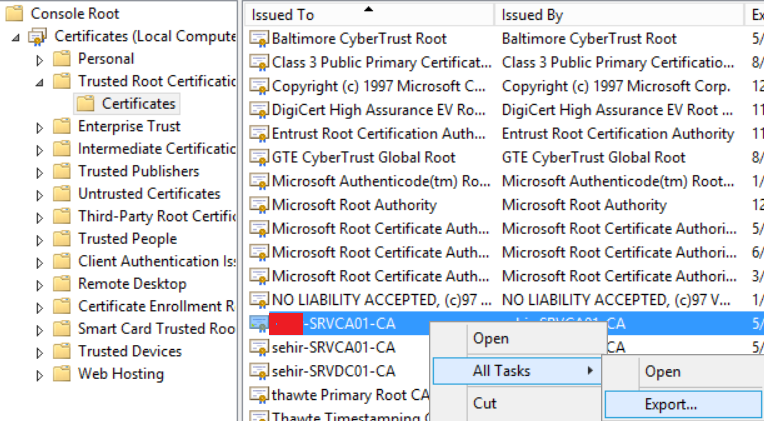
In the console, expand Certificates (Local Computer) and then expand Trusted Root Certification Authorities. Click Certificates, and then in the details pane, locate the first trusted root certificate you need for operating system deployment clients. Right-click the certificate you require, click All Tasks, and then click Export.
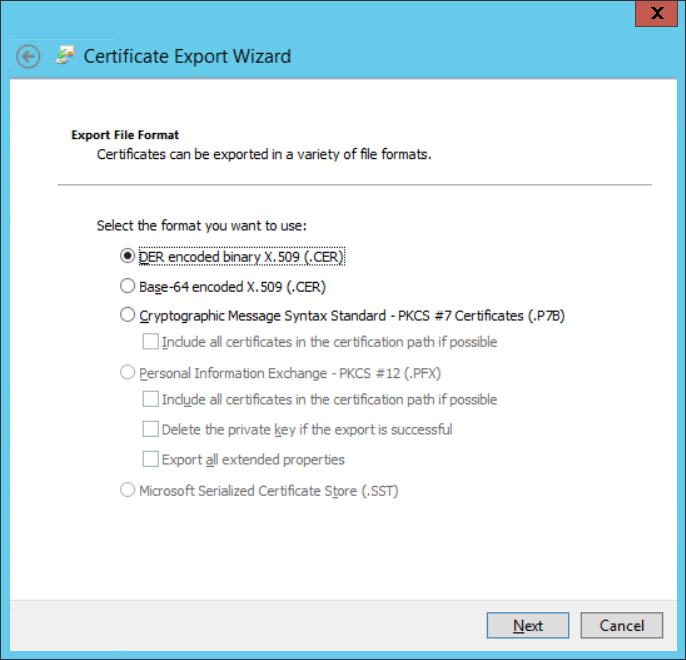
In the Certificate Export Wizard, click Next. On the Export File Format page, ensure DER encoded binary X.509 (.CER) is selected and then click Next.
In the File to Export page, specify a path and file name for the exported certificate and then click Next.

On the Completing the Certificate Export Wizard page, click Finish.
- Hits: 4207