WAMP 3 Hosting Multiple Sites - Configuring for Internet (external access)
You can download and install WAMP from the link below.
After you complete the installation go to browse phpmyadmin (http://localhost/phpmyadmin/)
The default credentials: root / empty password
Create new database

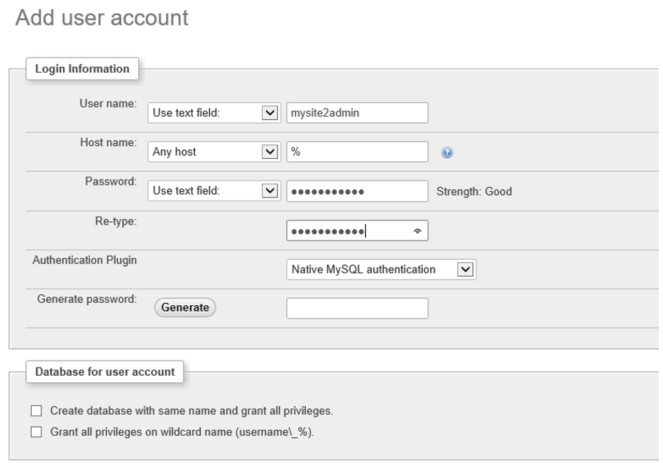
Then create a new user for the new database (mysiteadm)

Do not add any priviledges now
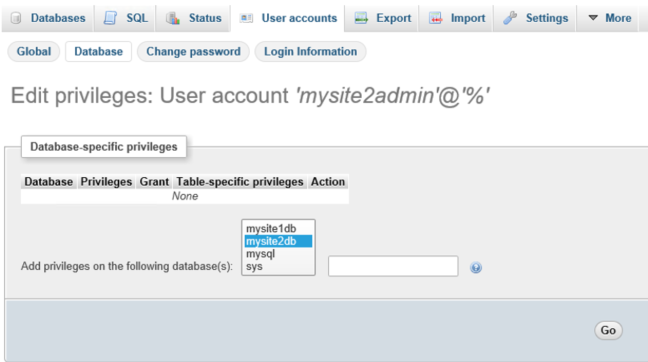
Select Database tab and select mysite2db, click Go
Put a tick on Check All and click Go. This will give to the user all priviledges on the selected database
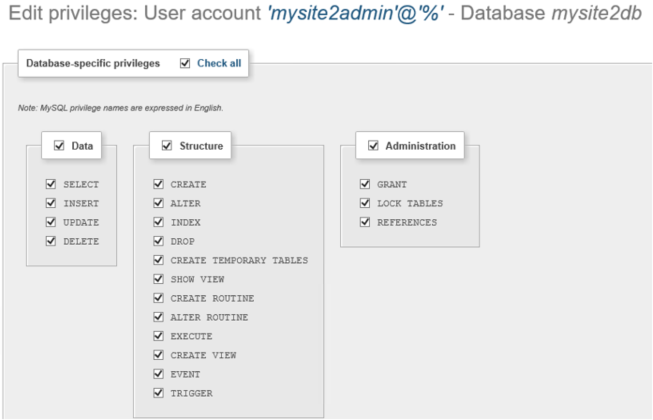
We see who has privileges on mysite2db in the screenshot below.

Create a folder named mysite2.com in D:\wamp\www
Then copy Wordpress setup files in to mysite2.com folder.
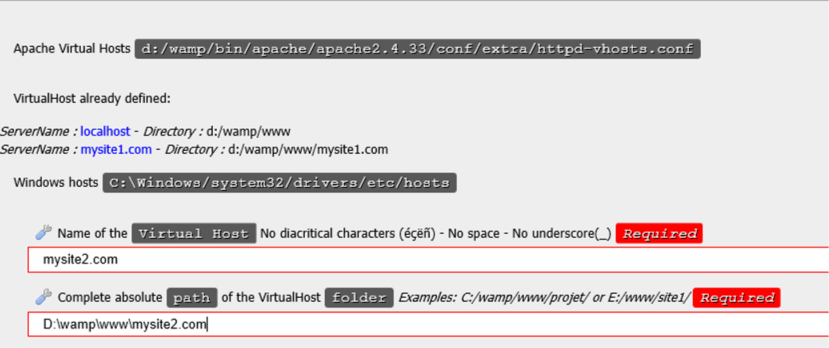
Create a Virtual Host for mysite2.com as follows
Enter the name of the VH and path to the folder and click the button “Start the creation…”
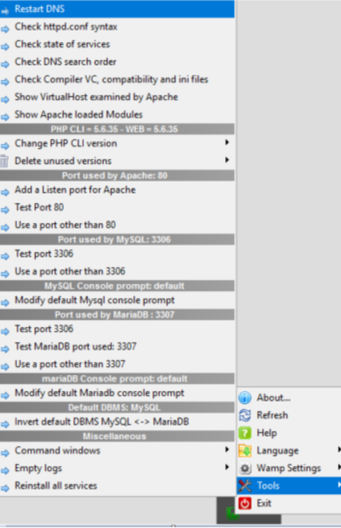
Right click on Wamp Server Tools > Restart DNS to complete the Virtual Host creation.
Run wordpress setup and install it

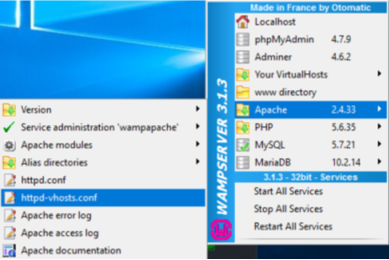
Select Apache > http-vhosts.conf file
And modify Virtual Host Setting for MySite2.com as below. We added ServerAlias and “Require local” is changed to “Require all granted”.
Restart DNS as we did earlier above. (Right click WAMP > Tools > Restart DNS)

Check your hosts file which is located on C:\Windows\System32\drivers\etc
Make sure entry for mysite2.com is there

Open up httpd.conf file (WAMP> Apache > httpd.conf)

And make sure the config is correct for the entries I show here.
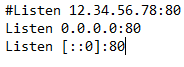
Make sure you change Require local to Require all granted
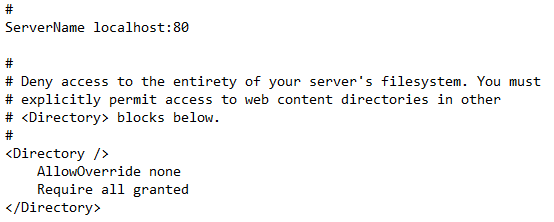
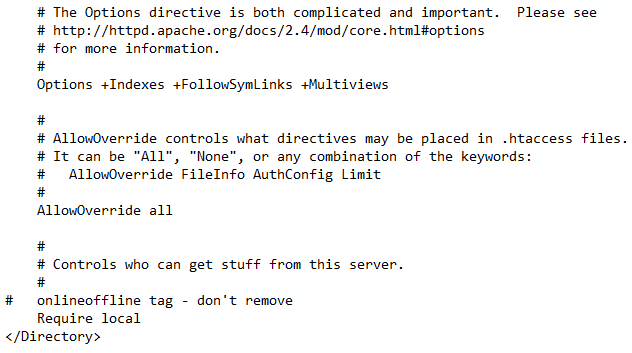
Save httpd.conf
Restart All Services.
Follow the same procedure for creating the other web sites. All you need is now buying domain names for the new websites, buying a static ip and forwarding ports to your hosting server for traffic 80.
- Hits: 3079