
We need to do some network related configuration on VCenter. First I will configure active and standby NICs on vSwitch0. Then I will add another VLAN on my vSwitch0. After that I am going to add another vSwitch for Vmotion, I will set its active/standby NICs and set the MTU size as 9000. vSwitch0 MTU size will remain as 1500 which is default.
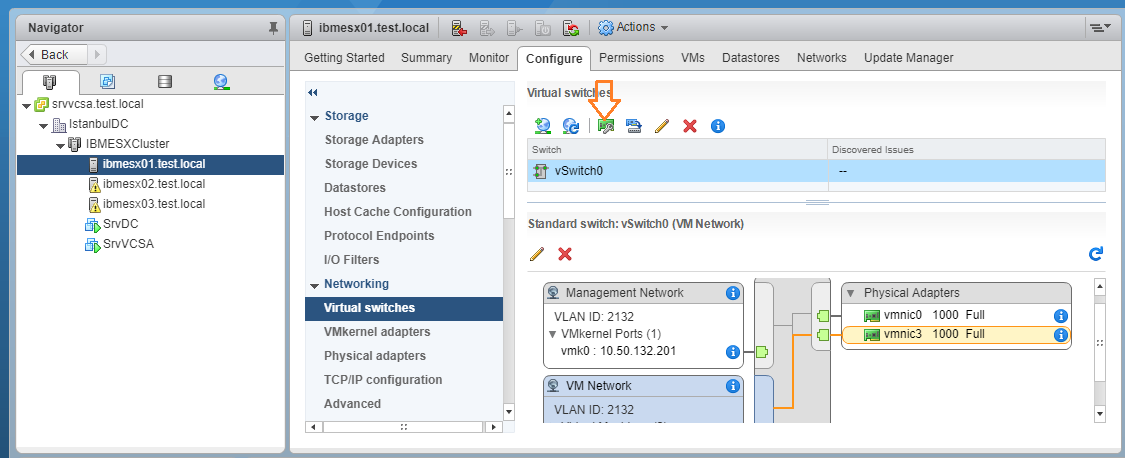
Right now I have only one standard vswitch as below.
Set Active and StandBy NICs for Switch0
Click the marked icon to set active and standby NIC.
I set VmNIC3 as active and VmNIC0 as standby. If Vmnic3 goes down, VmNIC0 will take over and service will not be interrupted. Do this on each ESXi hosts

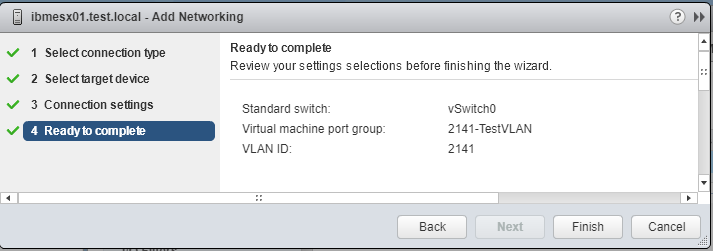
Add A New VLAN on Switch0
We don't have to add a new VLAN but you might want to keep some of your VMs seperately and in production environment this is inevitable. For example I keep my infrastructure servers like domain controllers, dhcp, certificate servers in one VLAN and I keep management servers in another VLAN and so on. This is why we have set NIC0 and NIC3 as Trunk on Physical Network Switches in the previous article.
Click the shown icon as below to add another VLAN (VmPort Group).

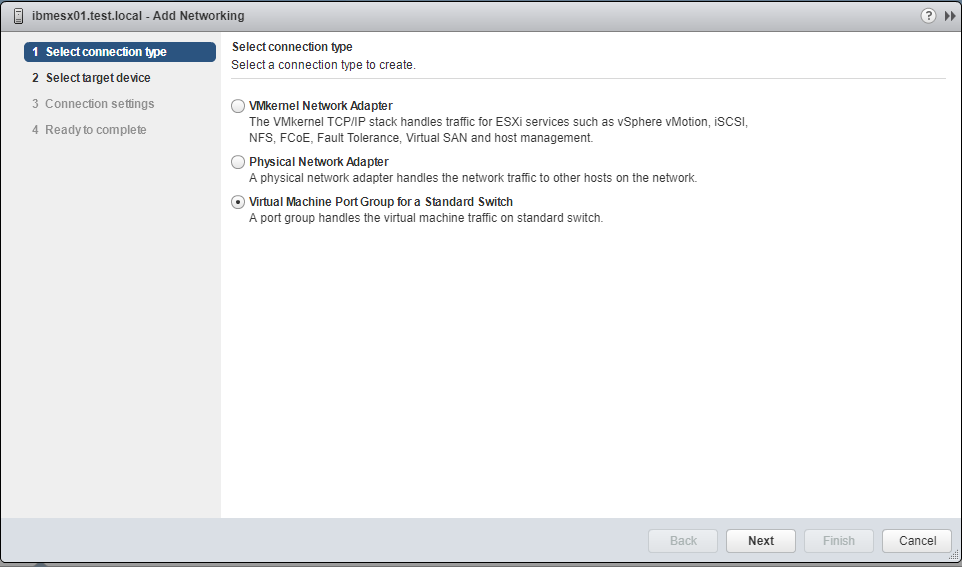
Select Virtual Machine Port Group for a Standard Switch
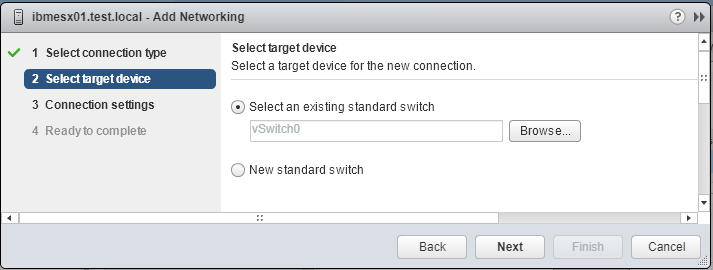
vSwitch0 selected by default
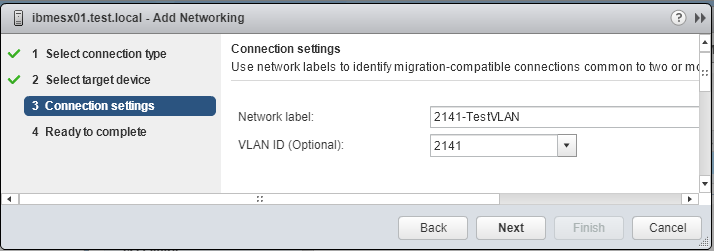
Enter the VLAN information. Because I am not using distributed switches I need to do the same configuration on all my ESXi hosts. Therefore I have to use the same network label on each ESXi hosts.
Click Finish. Do This on each ESXi hosts.
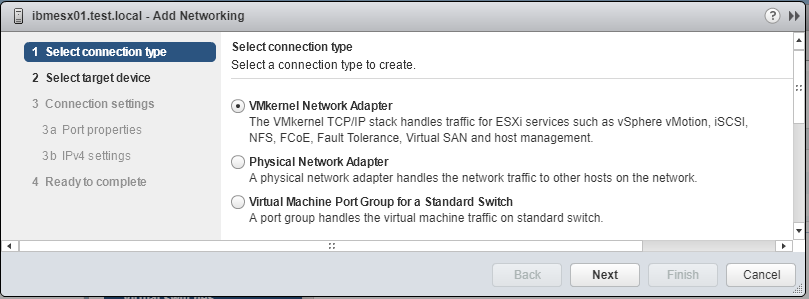
Add another vSwitch For VMotion and Configure it
There is a great article about why we should keep VmNetwork and Vmotion network separated. It is really helpful. You can read it from link below.
Click the Add Host Networking button
Select VMKernel Network Adapter
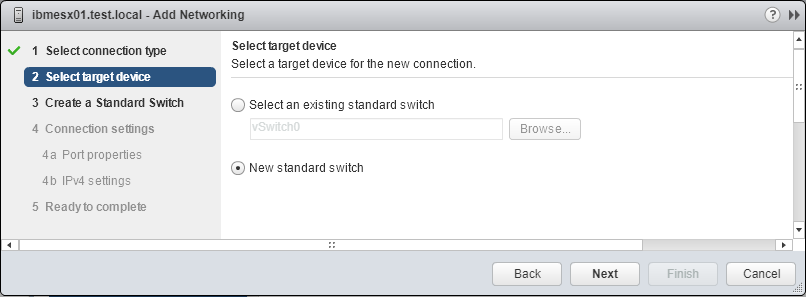
Create a new switch
Set the active/standby adapters for this switch

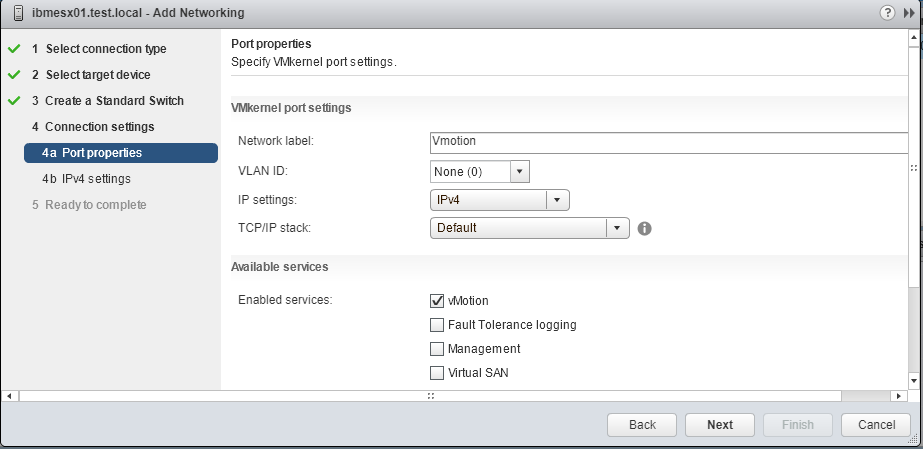
Enter a Network Label and select Vmotion service
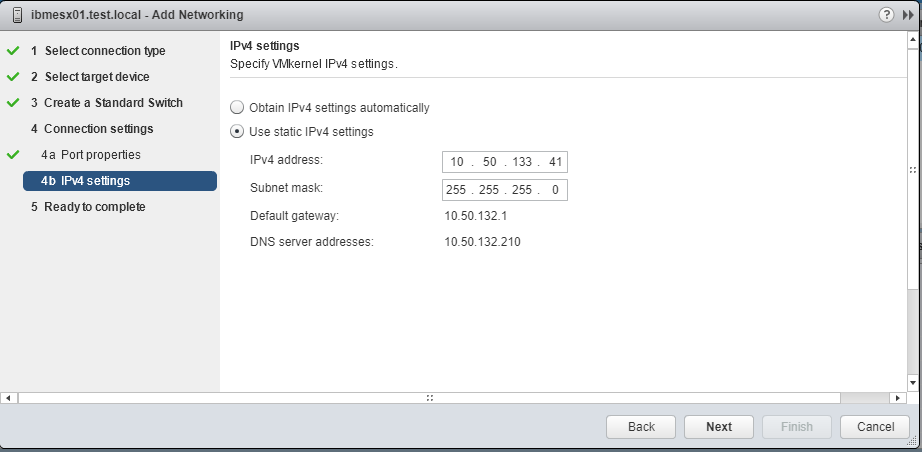
Enter VMKernel IP address and subnet mask
and complete the wizard.

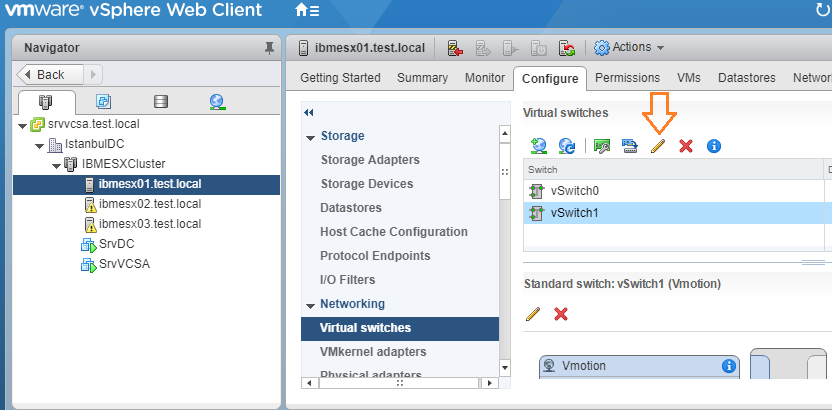
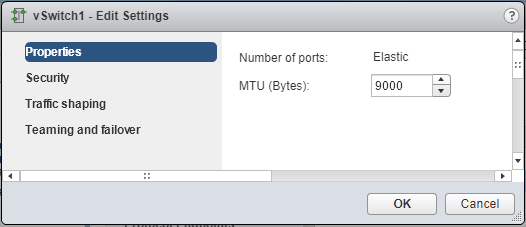
Now lets set Switch MTU size as 9000. Select the newly created switch and click the Edit icon.
Enter the value as 9000 Bytes.
Update: After you set MTU for Switch1, Vmotion MTU size also should be set to 9000, I just forgot to add the screenshot for it.
Do the same configuration for other ESXi hosts. The VmKernel IPv4 adress will be different on for each hosts. The ip addresses I used for IBMESX02 is 10.50.133.42 and IBMESX03 is 10.50.133.43. I have already explained ip address planing in Part2.
Now we can move the domain controller and vcsa server to a storage LUN. Just right click the Vm and select migrate from the menu. Wizard will ask you where to migrate, you just need to specify the LUN on which you want to move.
In the next article, We will join our hosts to our domain and integrate VCenter to Active Directory.