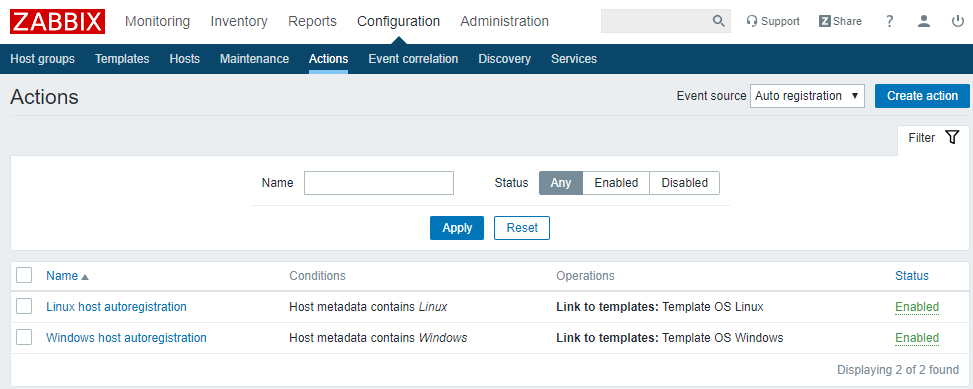
It will be convenient if hosts are added automatically to zabbix server after we install the zabbix agent on our hosts. Open up zabbix front end and do the following.
Configuration > Action and in drop-down menu “Event source“, select Auto-Registration > Create Action

For Linux :
Name: Linux host autoregistration
Conditions: Host metadata contains Linux (case sentive)
Operations: Link to templates: Template OS Linux
For Windows :
Name: Windows host autoregistration
Conditions: Host metadata contains Windows (case sentive)
Operations: Link to templates: Template OS Windows
We will have 2 entries like this
Agent Installation on Linux:
wget http://repo.zabbix.com/zabbix/3.2/ubuntu/pool/main/z/zabbix-release/zabbix-release_3.2-1+xenial_all.deb
dpkg -i zabbix-release_3.2-1+xenial_all.deb
apt-get update
apt-get install zabbix-agent
nano /etc/zabbix/zabbix_agentd.conf
Edit zabbix_agentd.conf like below
Server=Your zabbix server ip address
ServerActive=Your zabbix server ip address
HostMetadataItem=system.uname
HostnameItem=system.hostname
sudo systemctl start zabbix-agent
sudo systemctl enable zabbix-agent
sudo systemctl status zabbix-agent
ufw allow 10050/tcp
Agent Installation on Windows:
Copy zabbix agent folder to C drive on a windows system
Create a bat file named install.bat in that zabbix folder and copy the following lines of command in that batch file
cd c:\zabbix\bin\win64
zabbix_agentd.exe --config c:\zabbix\conf\zabbix_agentd.conf --install
zabbix_agentd.exe --start
@echo Press any key to continue
pause
exit
Run install.bat as administrator and that's it.
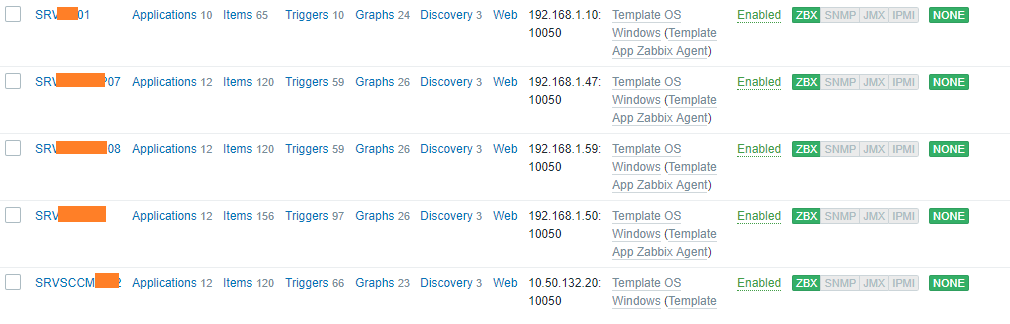
In a short time, hosts will be listed under Configuration >Hosts