
In this post we will deploy Windows 10 operating system on MDT Integrated SCCM. If you have a customized reference image you can import as below or you can just use vanilla Win10 image.
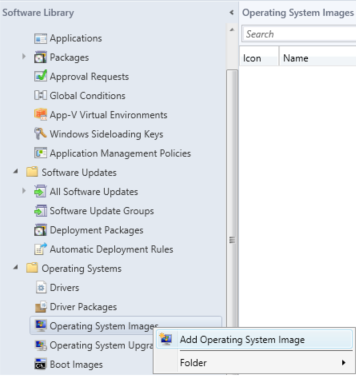
Software Library> Operating Systems > Operating System Images > Add Operating System Image
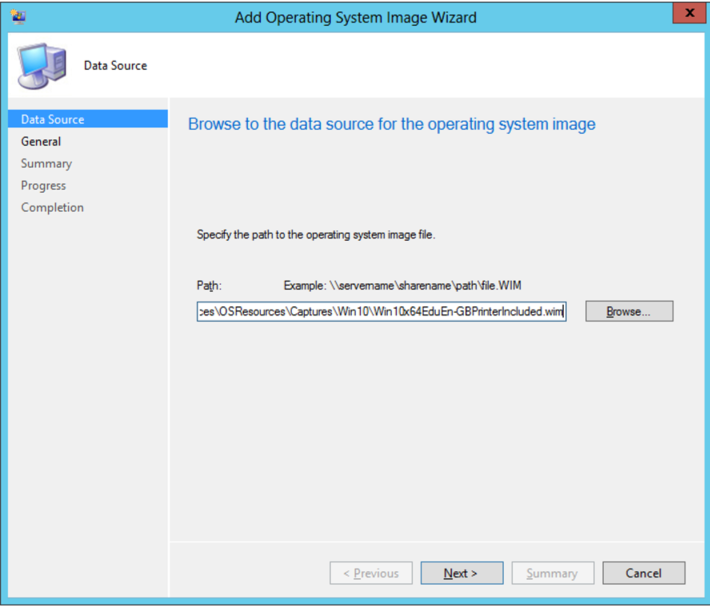
Enter the UNC path of the captured wim file and complete the rest of the wizard.
Don't Forget:
Distribute the operating system image to the distribution point by right-clicking the Windows 10 operating system image and selecting Distribute Content.
Keep Your Image with the Latest Updates: I experienced that installing software updates during the OS Deployment takes too much time to finish. So, I will inject my software update monthly to my image manually. We can inject the latest software updates to our wim images whenever we like and keep the image updated. Offline Servicing is not a complete solution as it does not allow for all types of Microsoft Updates (such as Office Updates) to be injected into the WIM.
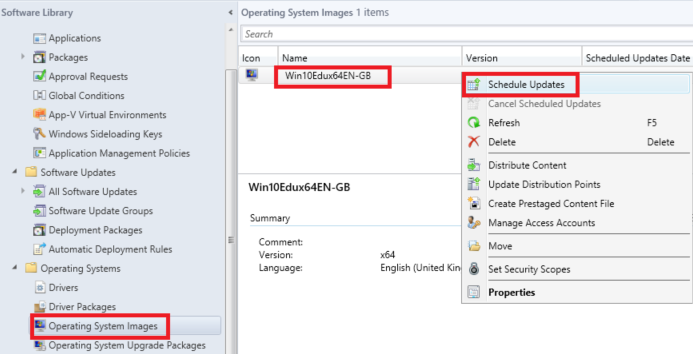
Right click the OS image and choose Schedule Updates.
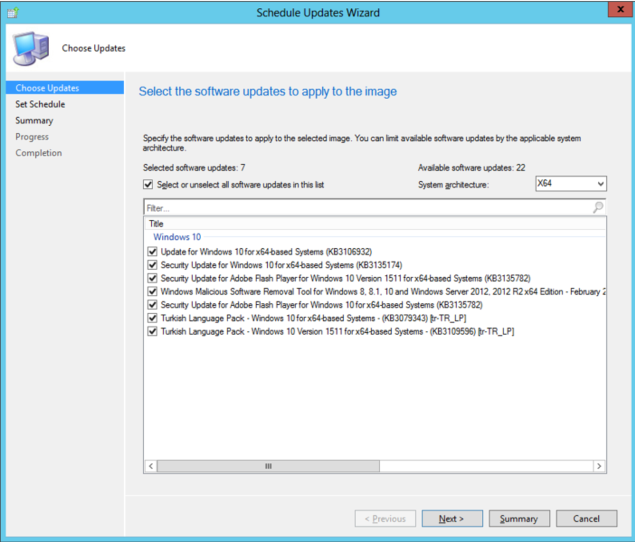
and Select the Updates you want to add
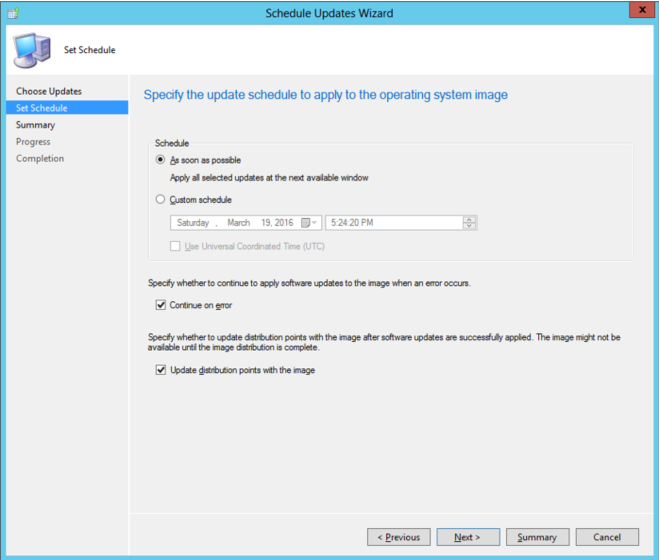
Schedule it As soon As possible, tick to continue on error and Select Update DPs with the image, so it will update the image on DPs. Complete the rest of the wizard.
You can see the update process. When this process finishes, its status will be “Succesful”

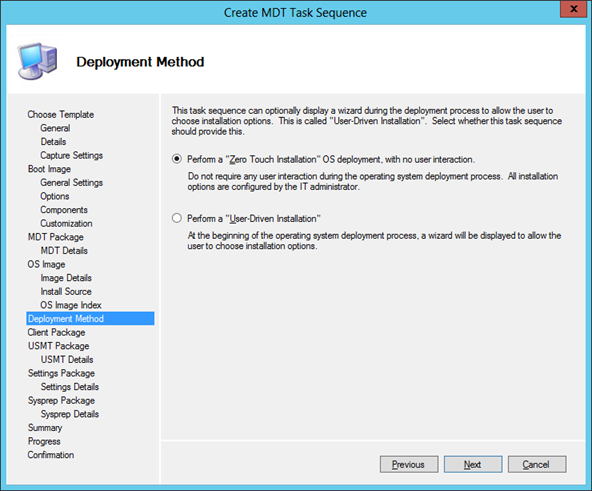
Creating MDT Task Sequence:
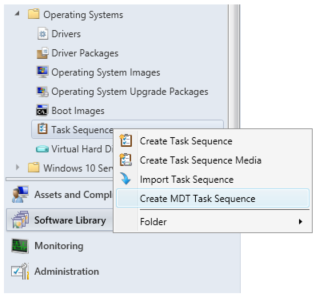
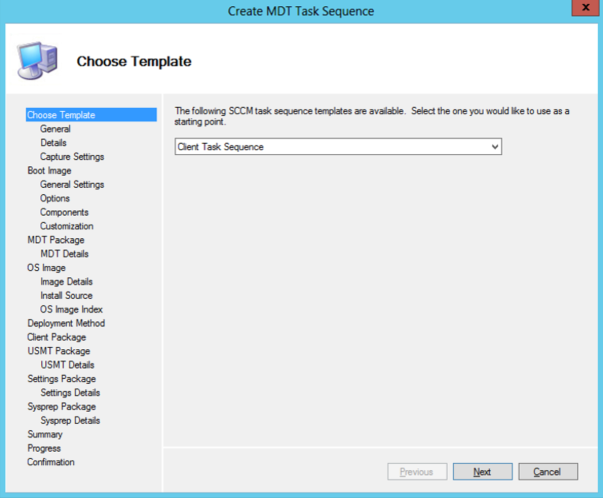
Right click Task Sequences and select Create MDT Task Sequence. If SCCM is not MDT integrated and if you want to integrate them, you can follow the article OSD Part5 - Install and Integrate MDT
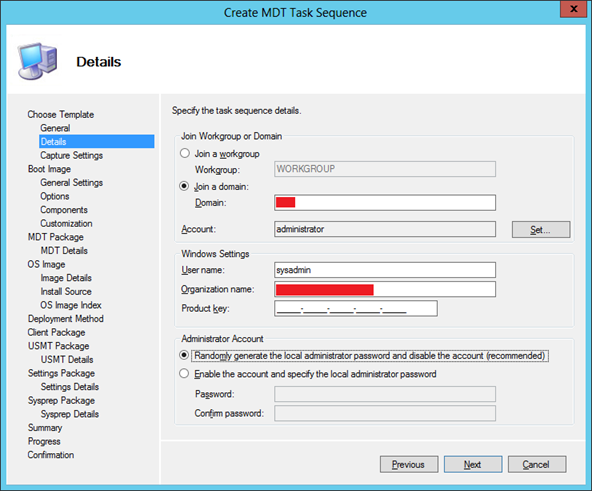
Enter your domain name, specify the user account that will be used while joining computers to the domain.
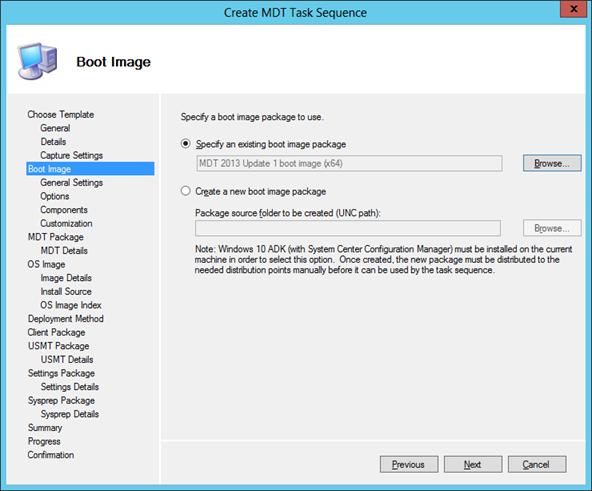
Click Browse and select the MDT boot image
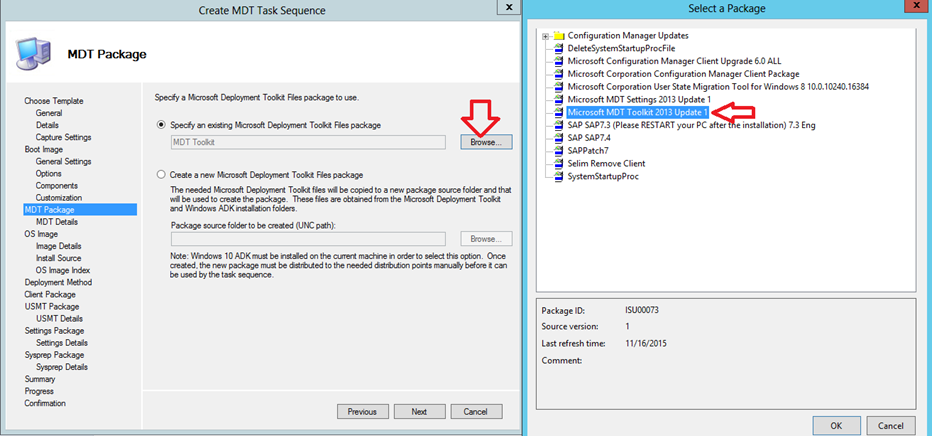
Browse and add MDT Tookit Package
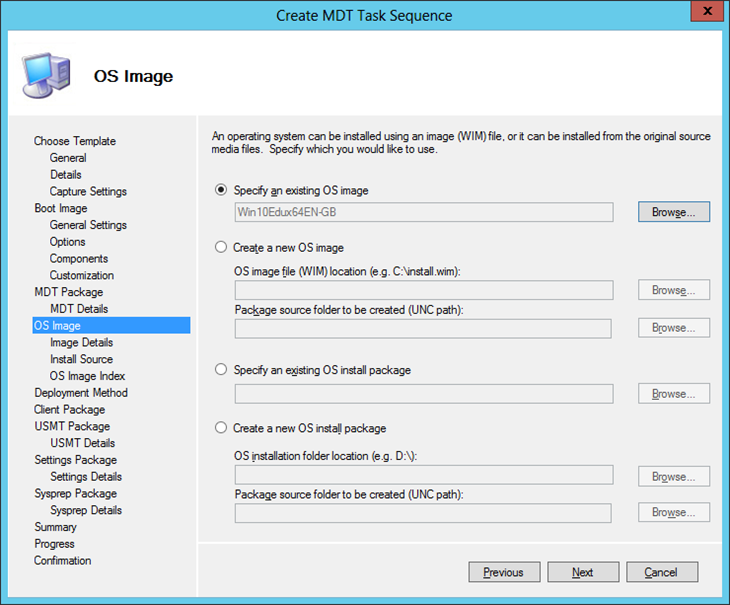
Here we are adding the OS image file to our Task Sequence
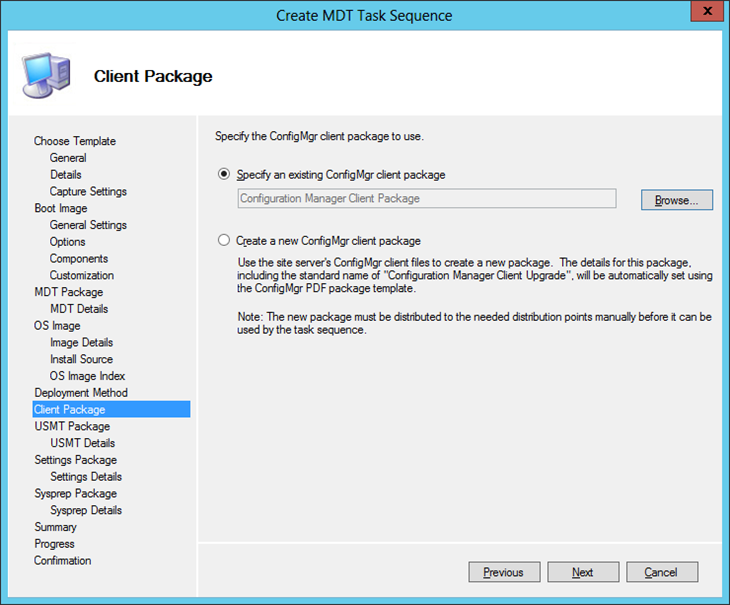
Here we add Configuration Manager Client to our TS
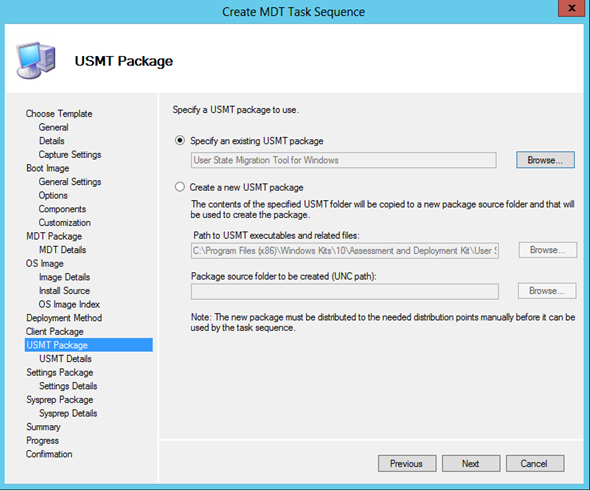
Add USMT package
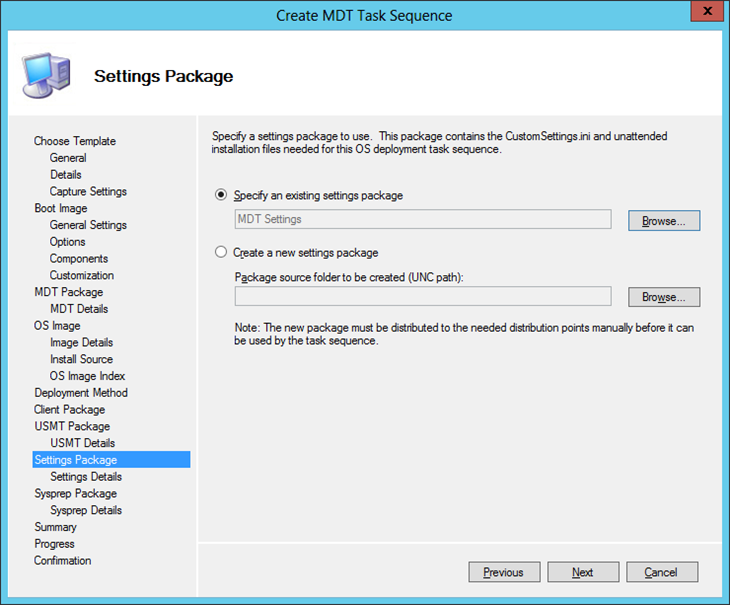
Add MDT Settings Package
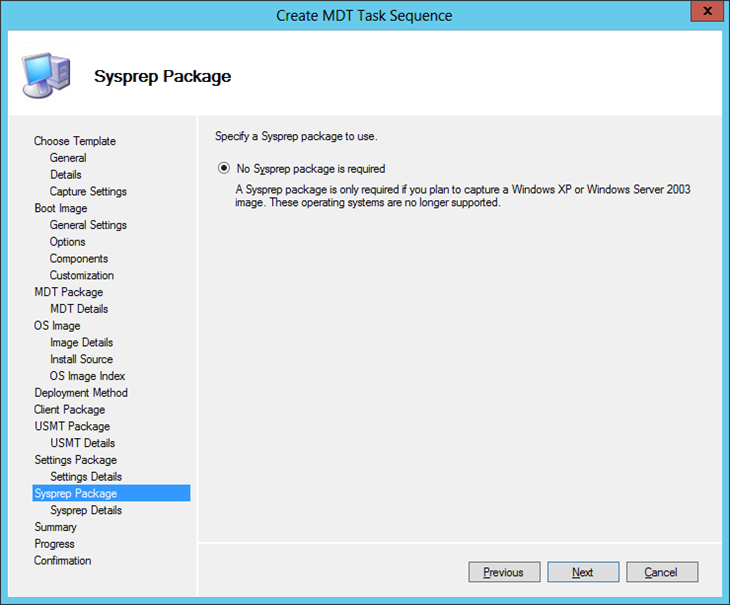
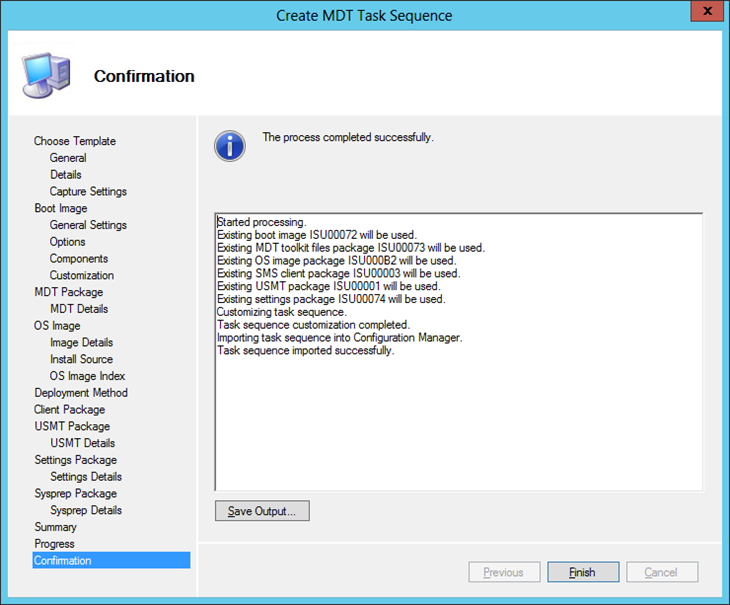
Click Finish. We created the Task Sequence but it is not ready. We need to Edit our Task sequence and add the custom TS steps.
Task Sequence Customization:
Creating Driver Packages: The driver catalog helps manage the cost and complexity of deploying an operating system in an environment that contains different types of computers and devices. By storing device drivers in the driver catalog and not with each individual operating system image, the number of operating system images needed is greatly reduced.
First Create a folder structure like below for driver source files, we will copy the driver files to this path
\\SCCMServer\Sources\OSResources\Drivers\DriverSources\Win10\YourComputerModel
Then create this path to keep our driver packages
\\SCCMServer\Sources\OSResources\Drivers\DriverPackages\Win10\YourComputerModel
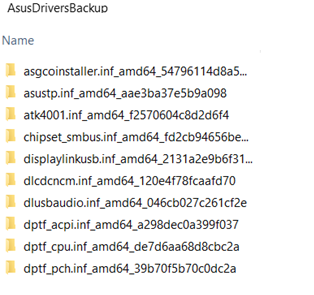
Because the computer manufacturer does not have win10 drivers for my computer model I had to install drivers via Microsoft Windows Update on a computer and then export the drivers using the powershell command below.
Export-WindowsDriver -Online -Destination D:\AsusDriversBackup
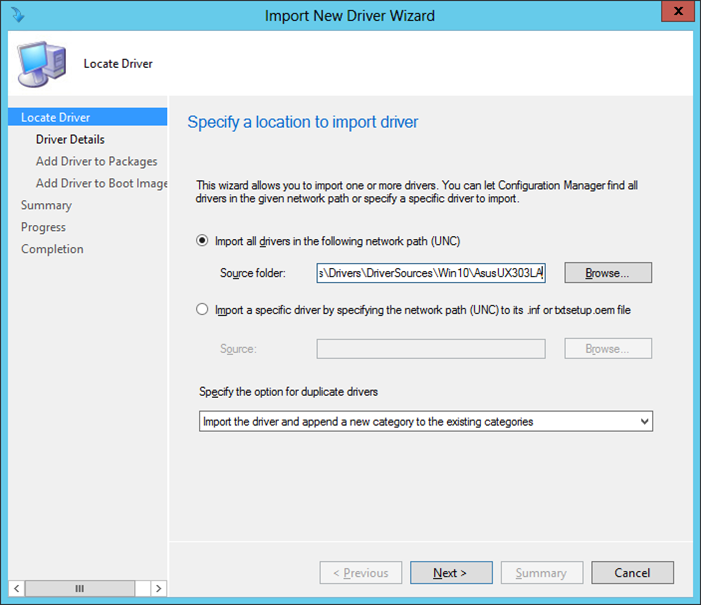
copy these exported drivers to the following UNC path
\\SCCMServer\Sources\OSResources\Drivers\DriverSources\Win10\YourComputerModel
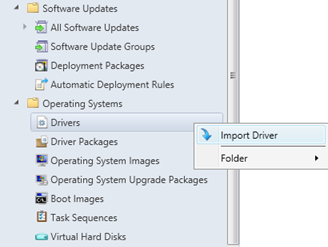
We need to import the drivers to the Driver Catalog
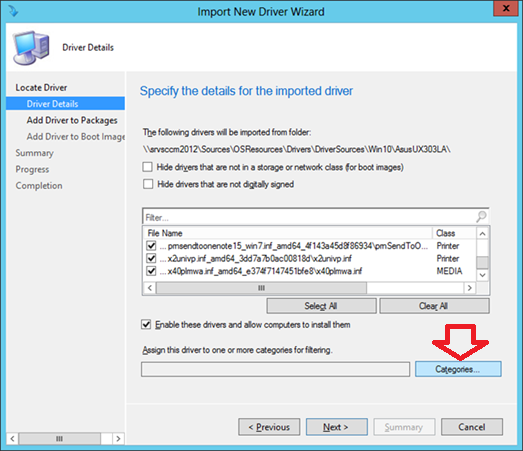
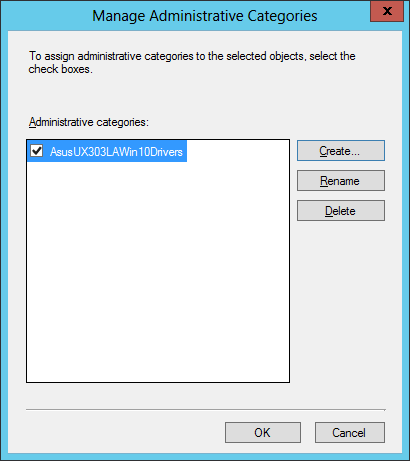
Click Categories and create a new category the computer model
Click OK
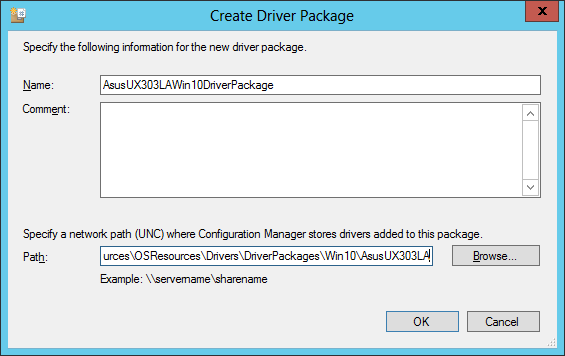
Click New Package
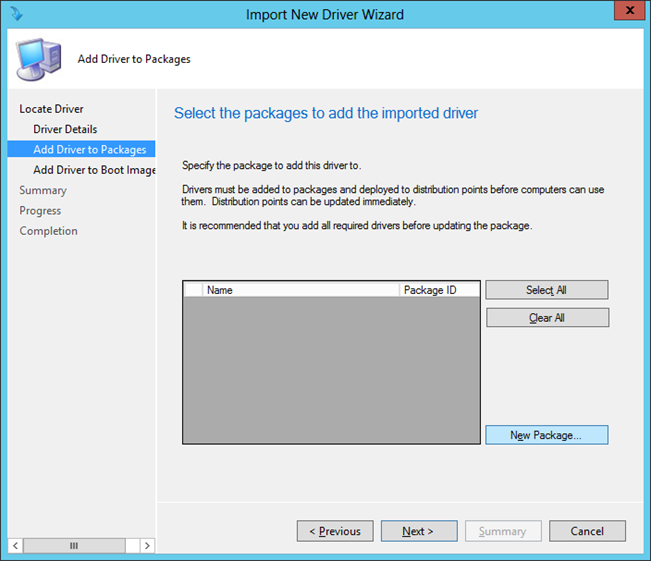
Enter a descriptive name fort he driverpackage and browse the UNC path of the driverpackage folder
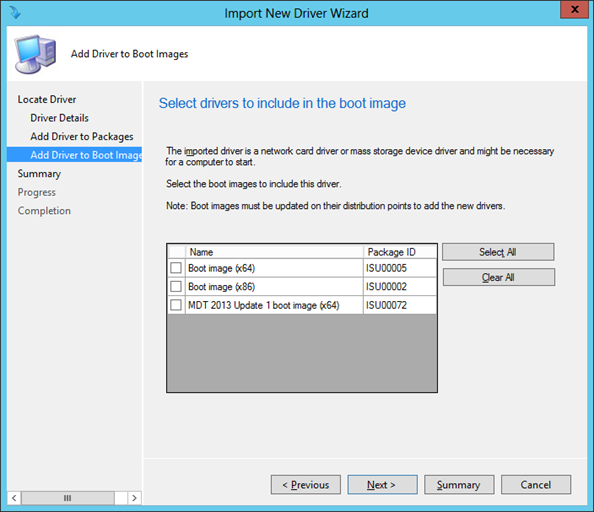
I don't need to add NIC or disk drivers because Win10 will recognize them automatically. If you need to add drivers to the boot image you need to select the boot image on this window. Click Next and complete the rest of the wizard.
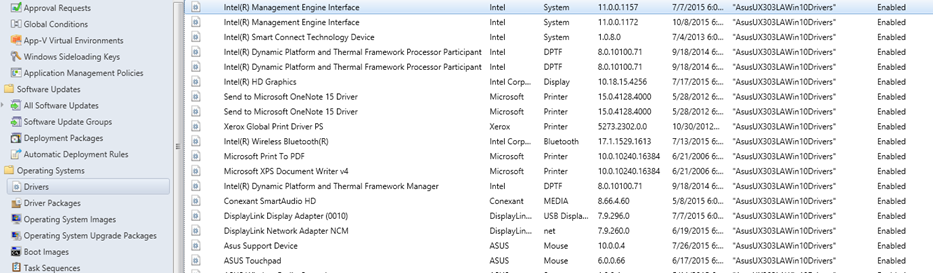
And drivers are added to the Drivers Catalog
Dont Forget:
Now distribute the driverpackage to the Distribution Point.
1. Adding Drivers to our Task Sequence:
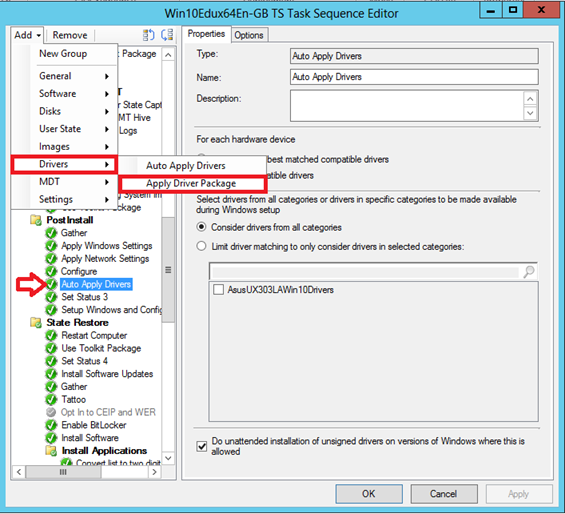
Auto Apply Drivers task sequence step allows Configuration Manager 2012 to search for the appropriate device drivers from driver categories. On the other hand Apply Driver Package task sequence step allow Configuration Manager 2012 to install only device drivers from a specific category. We will first add Apply Driver Package task sequence step and then disable the existing Auto Apply Drivers task sequence step. Typically, the Apply Driver Package task sequence step is placed after the Auto Apply Drivers task sequence step.
Right click the task sequence and choose Edit> Select Auto Apply Drivers to add the new TS step just after it>
Add> Drivers >Apply Driver Package
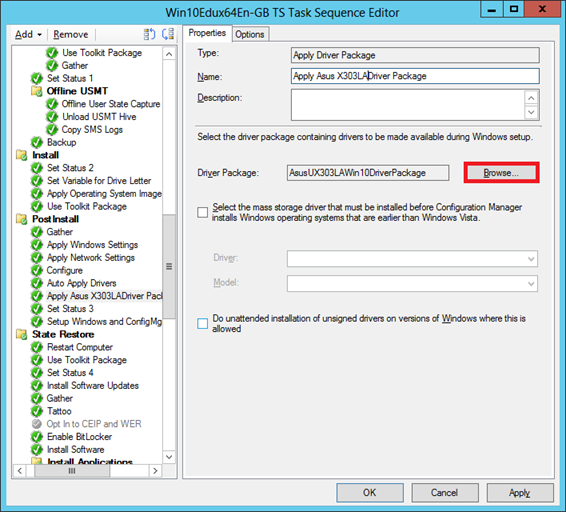
Click Browse and select the correct driver package
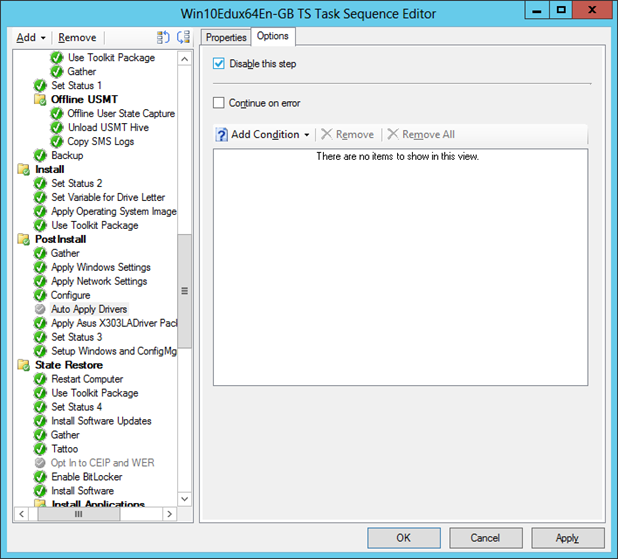
Disable the Auto Apply Drivers Step. We finished the drivers related part for our TS.
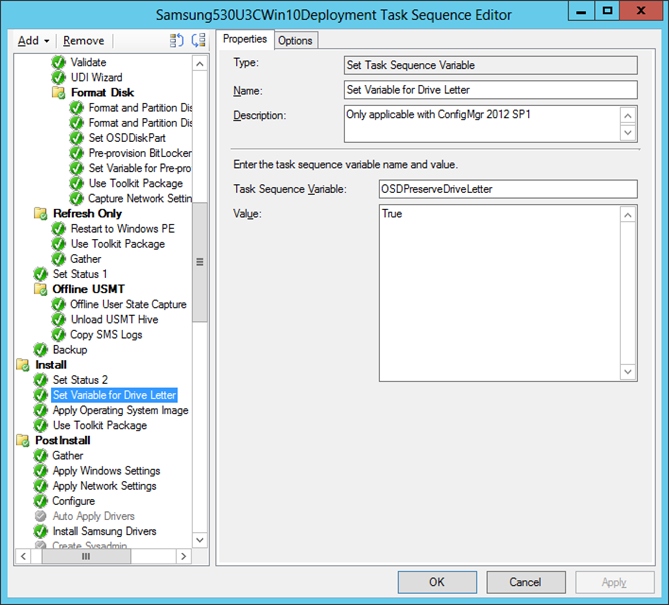
2. Set Drive Letter:
In the Install group, select the Set Variable for Drive Letter action and configure the following:
• OSDPreserveDriveLetter: True
If you don't change this value, your Windows installation will end up in D:\Windows.
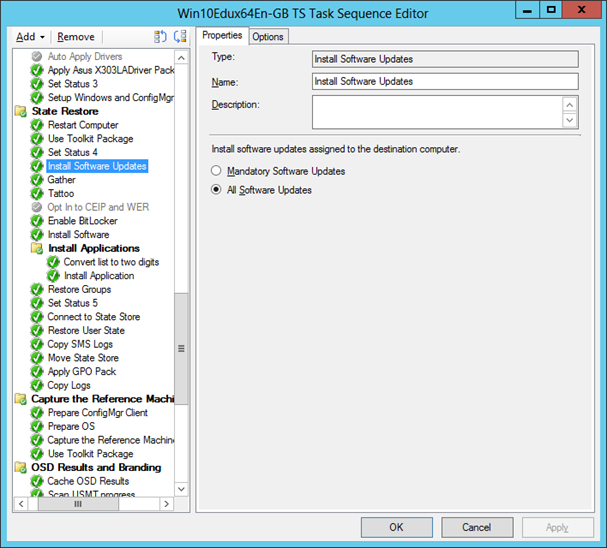
Software Updates: By default, TS is set to install all the updates. Keep it as it is.
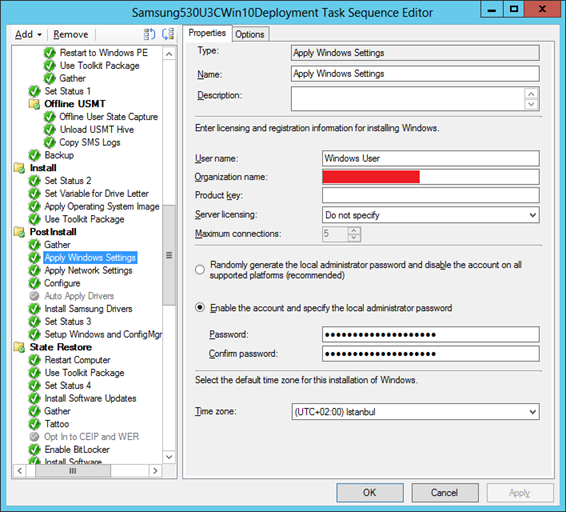
3. Time Zone:
You can specify the Time zone here
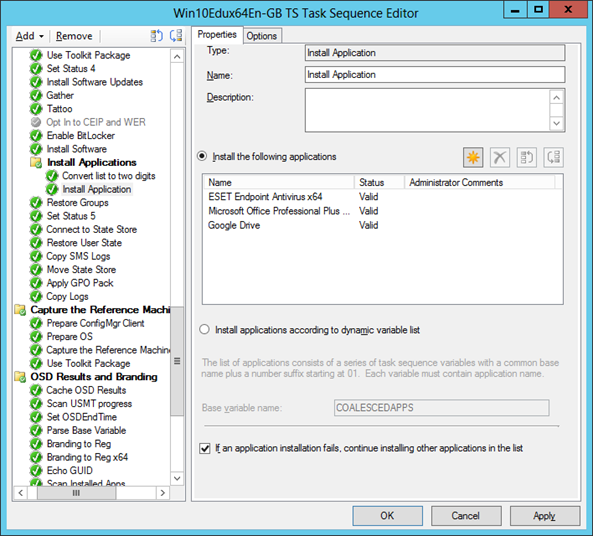
4. Add Applications:
Click Star icon to add the Applications you want to add to your deployment.
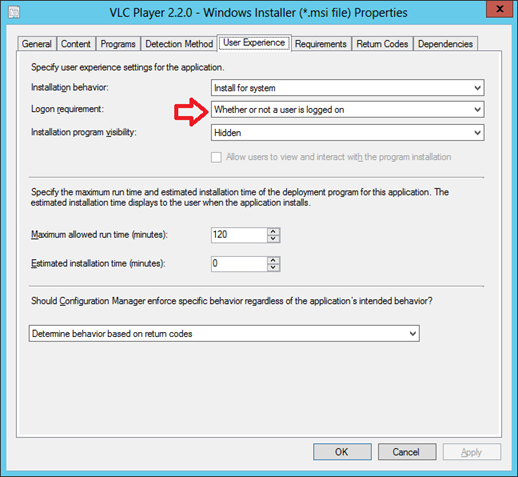
To make your applications available for OSD Task Sequence, application should be created for System and Logon requirement should be “Whether or not user is logged on” and distribute the apps to DPs.
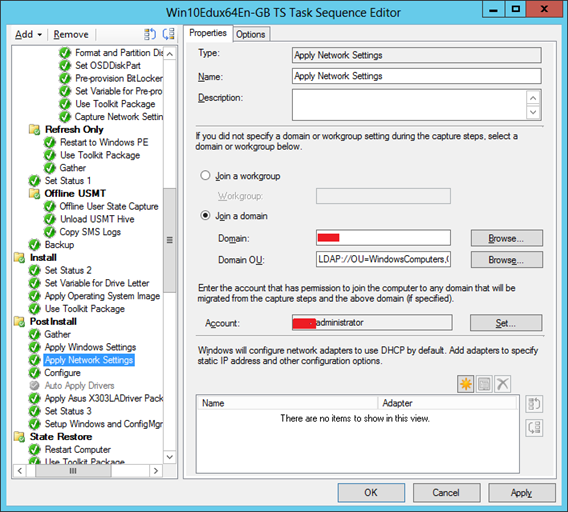
5. Add Computer to a desired OU
Enter the user accounts password that has the required priviledges to add computers to the domain
6.Adding Wifi Profile:
First I should export the wireless profile from a PC that is already connected to the wifi network with the following command:Run CMD as an admin
netsh wlan export profile name=”YourSSID” folder=C:\
Now edit the exported xml file.
Find “true” and change to “false”.
Then, between the “” tags there will be a long alphanumeric string. Remove this string and place in your wireless password. Save the xml file.
Copy the xml file under the MDTToolkit folder, I will copy it under MDTToolkit\Scripts\CustomRunCommands\SSIDProfiles\
I create a Custom Task Group just after Install Applications group, “Copy Logs” step for the custom tasks I need to add to my TS.
Because I will be working with MDTToolkit package in my custom task group for custom tasks, I also need to add Use Toolkit package TS step in this custom group. Otherwise %deployroot% or %scriptroot% namespaces will not be recognized.
Add> MDT > Use Toolkit Package
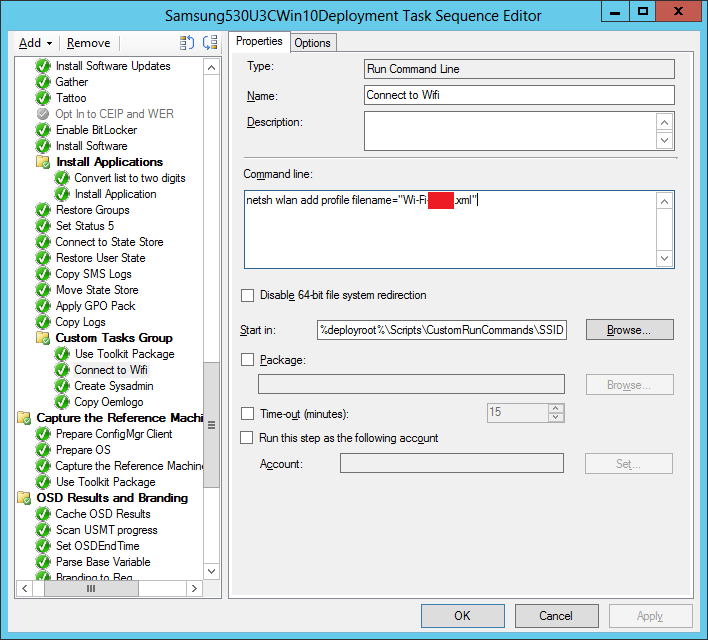
Then, Add a “Run command line” task step to the Task Sequence under Custom Task Group.
netsh wlan add profile filename="Wi-Fi.xml"
Start in: %deployroot%\Scripts\CustomRunCommands\SSIDProfiles\
Note:
%deployroot% is the root of that MDT files package
%scriptroot% points to the scripts folder within your MDT 2010 Files package
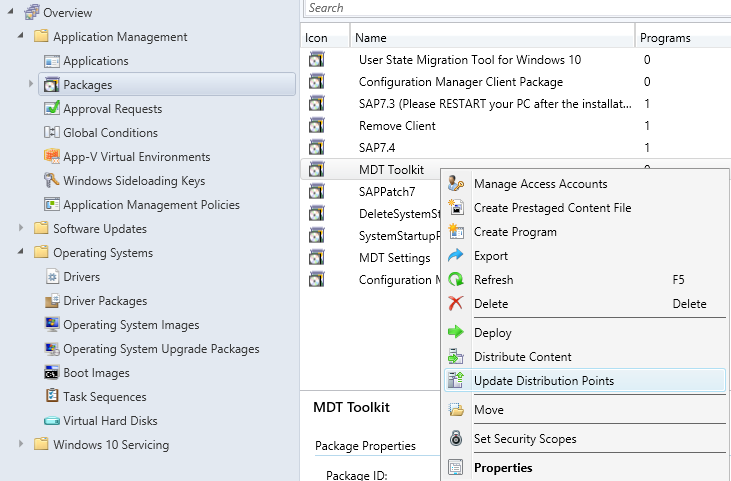
Dont Forget:
DONT FORGET TO UPDATE YOUR MDT PACKAGE on DPs!
7. Create a Local Admin Account
Create a bat file and type the commands below inside of it. Then copy that bat file to MDT Toolkit\Scripts\CustomRunCommands\YourUser folder.
net user /add YourUser Pass0001
net localgroup administrators YourUser /add
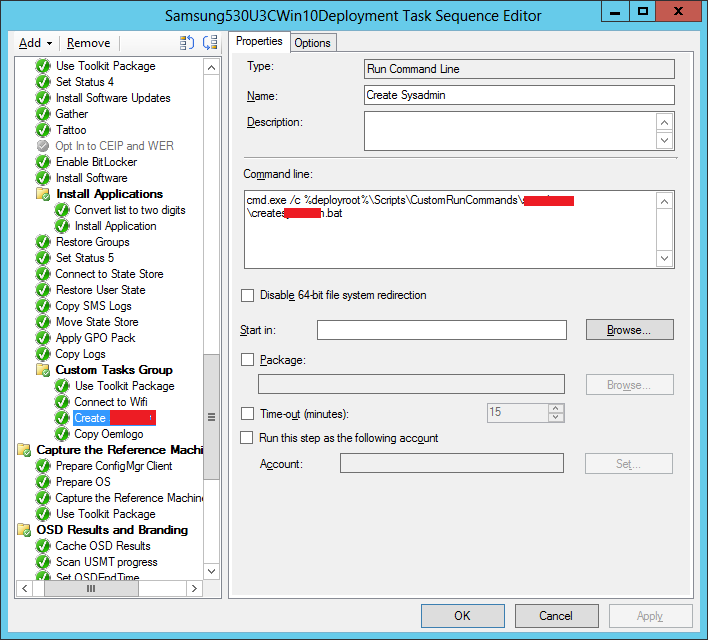
Create a TS step in Custom Tasks Group and use the command below.
Cmd.exe /c %deployroot%\Scripts\CustomRunCommands\youruser\createyouruser.bat
Dont Forget:
DONT FORGET TO UPDATE YOUR MDT PACKAGE on DPs!
8. Language and Regional Settings:
Because I am using MDT integrated SCCM, I already have Unattend.xml ready to be edited as I need for my deployments. For regional settings and Language, Open the Unattend.xml file that is located in the following path.
\MDT\MDT 2013 Update 1\MDT Settings
I want to keep my computer UI language as English and I need to change the keyboard layout, formatting and regional settings in Turkish. For that I just need to change these 3 tags as “tr” and leave en-US as it is.
<InputLocale>tr</InputLocale>
<SystemLocale>tr</SystemLocale>
<UILanguage>en-US</UILanguage>
<UserLocale>tr</UserLocale>
Dont Forget:
After you are finished with editing, just make sure you update the mdt settings package on Distribution Points. Otherwise your modifications will not be applied.
9.OEM Info:
Here I am modifying the unattend.xml file that is located srvsccm2012\Sources\OSResources\MDT\MDT 2013 Update 1\MDT Settings
First find the tag <settings pass="oobeSystem">
Under it you will find
<component name="Microsoft-Windows-Shell-Setup"
Just after AutoLogon closing tag, I place my tags for oem logo like below.
</AutoLogon>
<OEMInformation>
<Logo>c:\windows\system32\oemlogo.bmp</Logo>
<Manufacturer>Asus</Manufacturer>
<Model>UX303LA</Model>
<SupportAppURL></SupportAppURL>
<SupportHours>8:30AM to 5:30PM</SupportHours>
<SupportPhone>Support Phone Number</SupportPhone>
<SupportURL>Your Support Web Address</SupportURL>
</OEMInformation>
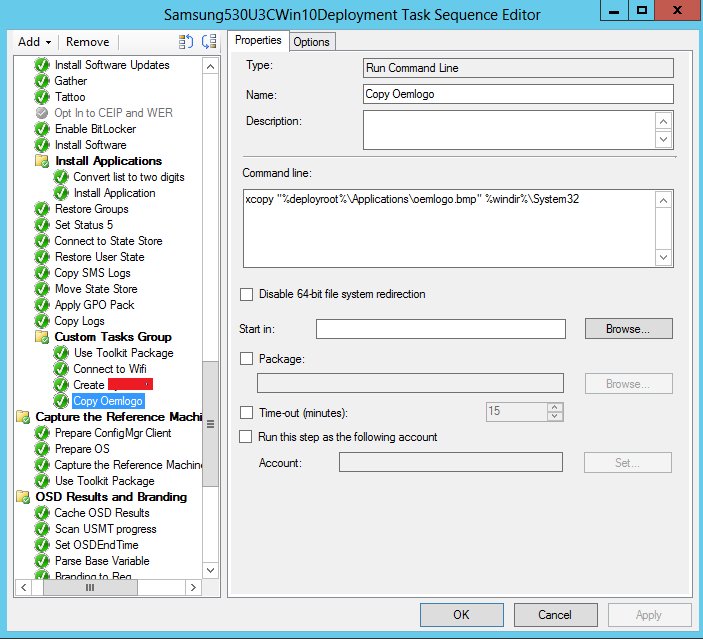
I copied oemlogo.bmp file to MDT\MDT 2013 Update 1\MDT Toolkit\Applications
and created another “run command line” task step to copy this bmp file to the path “c:\windows\system32\”
Command: xcopy "%deployroot%\Applications\oemlogo.bmp" %windir%\System32
After you are finished with editing, just make sure you update the mdt toolkit package on Distribution Points. Otherwise your modifications will not be applied.
I am finished with the customization and now I can deploy my TS to the appropriate collection for my computer model.
Deploy TS as Available to your deployment collection
Make sure Only Media and PXE is selected
Get mac address of the PC and import it to the SCCM (Asset and Compliance>Right click on Devices > Import Computer Information)
You can import single computer or multiple computers using a file. If the imported computer already exists on SCCM, PXE will fail. So make sure the computers you add here, are not on the SCCM. If they exist, you dont need to import anyway.
Now add the imported computer to the your deployment collection
Now you can PXE boot your computer