
IMPORTANT
We need a DNS server for VCSA Deployment. Therefore, I need to log on to one of my esxi server and create a virtual machine and install Active Directory and DNS roles on that Vm. When creating this VM, I select VmNetwork as its VLAN which 10.50.132.0 network(VLAN 2132 in my scenario). Windows ISO file for this Vm can be uploaded to the local disk on ESXi host temporarily, later we can move the ISO file and this VM to a Storage LUN. For ESXi5 you can download VIclient from ESXi host directly. If you are using ESXi6 or later a version you can directly reach the host from your browser and create the Vm.
After you install the DNS role, create a host record for Vcenter Server .
We also need to specify a NTP server during the VCSA deployment. I personally prefer to use my Domain Controller to run NTP service for all the devices in my network. Read this article, if you want to configure and sync your domain controller with a public NTP.
So, I assume we have done what I mentioned above. After DNS record has been created we can continue VCSA deployment.
I am installing appliance version of Vcenter server. This way I can get rid of windows server os and sql database license costs. VCSA comes with Postgresql database which is totally free. VCSA Deployment wizard must be run from a remote computer which can reach ESXi hosts and the DNS server from the network. So I will use my DNS server when running the VCSA Deployment wizard. Although my physical servers can run ESXi version 5.5, I can still use VCenter server 6.5.0-7070488 and that is the version I am installing.
Mount the iso file and navigate to CDDrive:\vcsa-ui-installer\win32 and run installer.exe

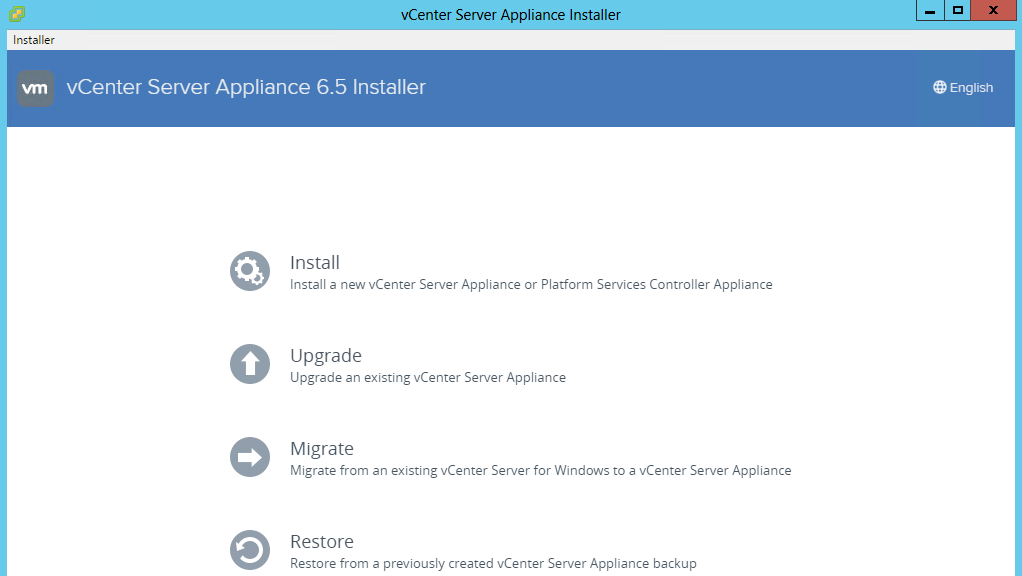
Click Install
Click Next

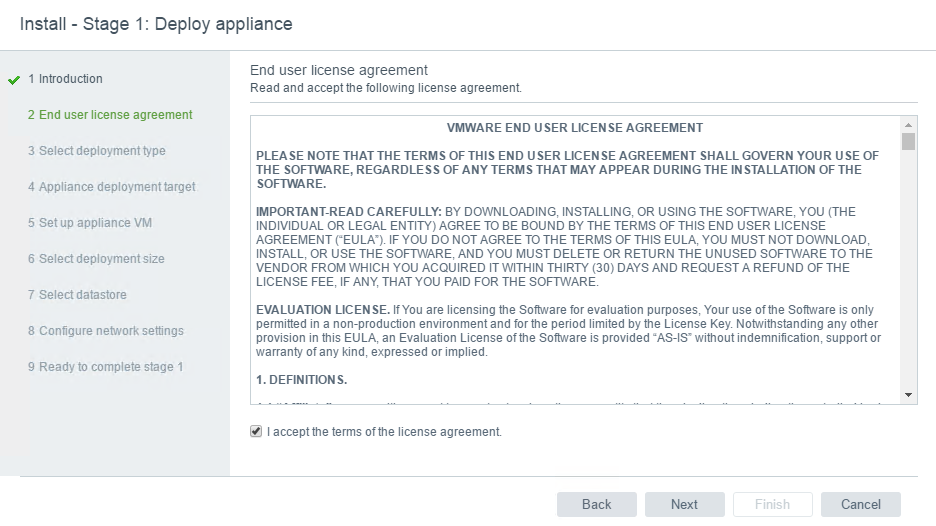
Accept the License agreement
Choose the deployment model

Enter the ESXi host information on which VCSA will be deployed

Specify the name for VCSA Vm and root password

Choose Appliance size

My Storage LUNs are not currently available. Therefore I will install on the local disk of the ESXi host. Later I can move and I should move it to a Storage LUN.

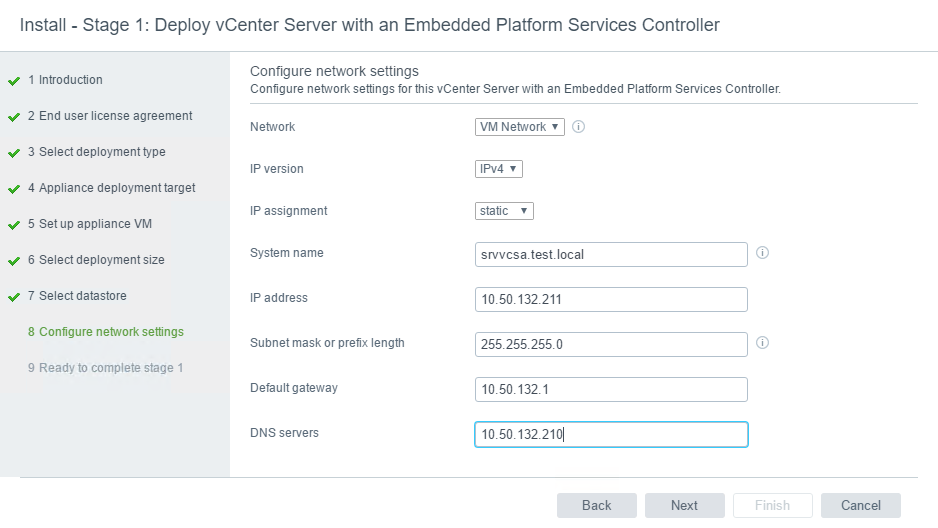
Enter the network configuration for the VCSA
And Click Finish

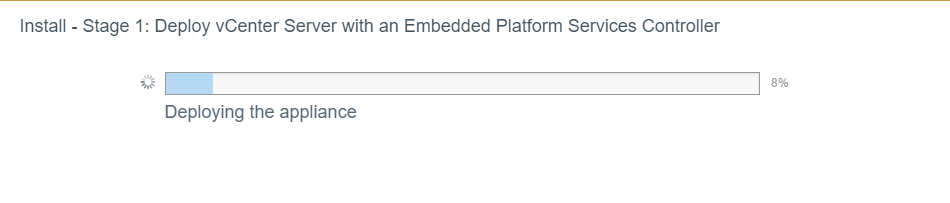
Stage1 of the deployment starts
Stage1 of the deployment completed successfully. Click Continue to start Stage2.

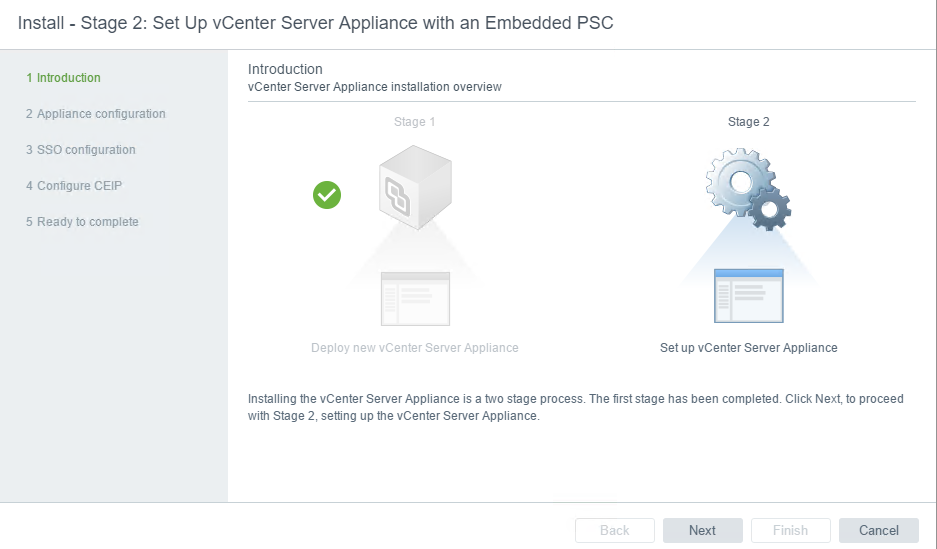
Click Next
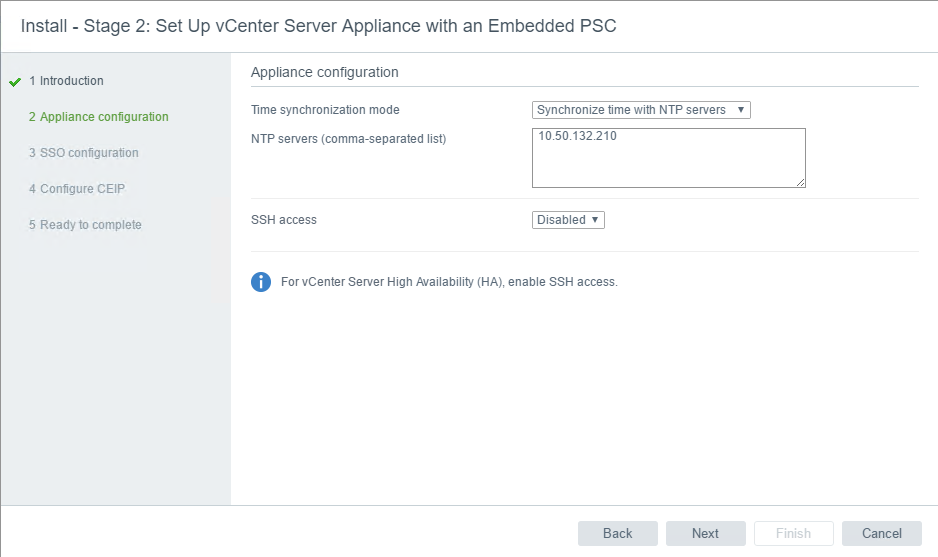
I prefer to use my Domain Controller to be the source for Time and I configured my domain controller to sync with an external NTP server. Therefore I can enter my Domain Controller ip address as NTP server.
Provide SSO information for VSphere infrastructure.

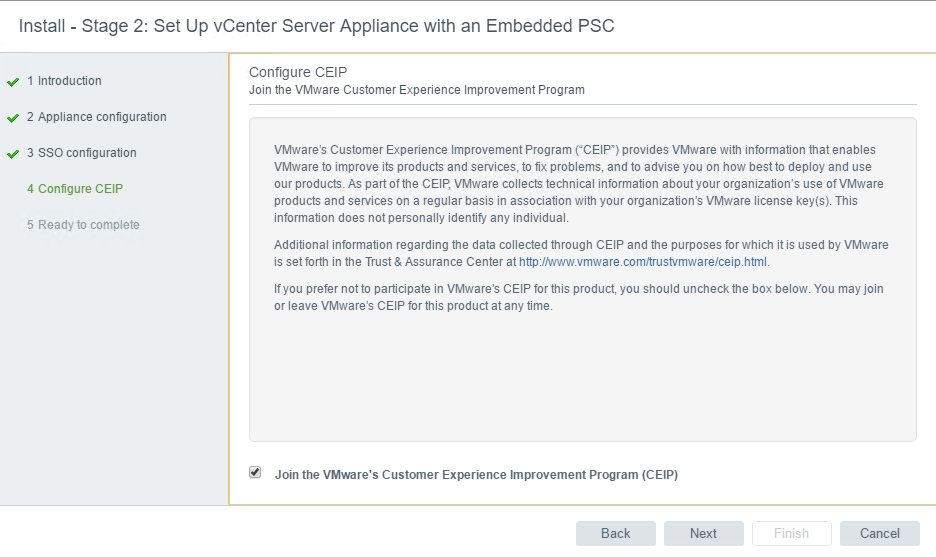
Click Next
Click Finish

Stage2 of the deployment starts

And Deployment finished successfully.
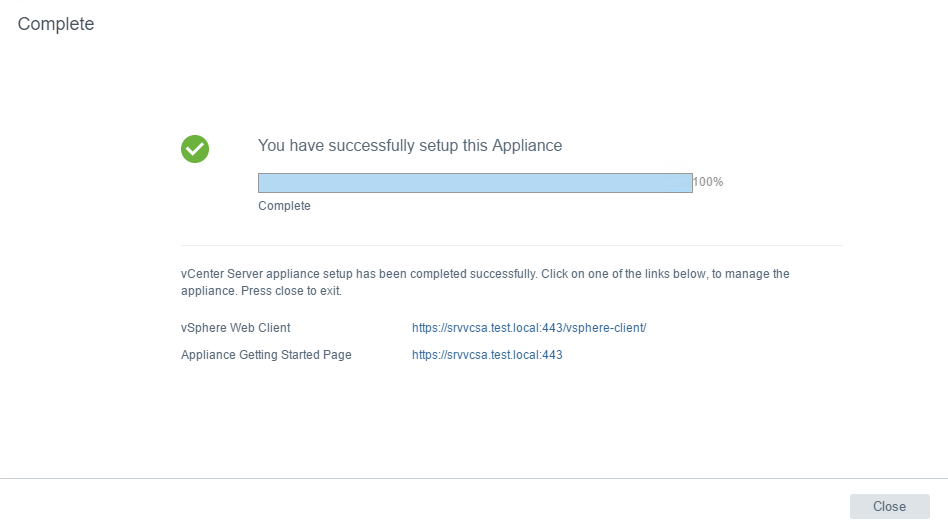
We can now connect to vSphere Web Client and continue configuration by browsing the address:
https://srvvcsa.test.local:9443/vsphere-client/

In Part 8, We will add ESXi hosts to VCSA.